

Upgrade your firearm platform today with a Pinty red or green dot sight and experience how simplified aiming, robust build quality, and excellent edge-to-edge clarity can elevate your days on the range or in the field.
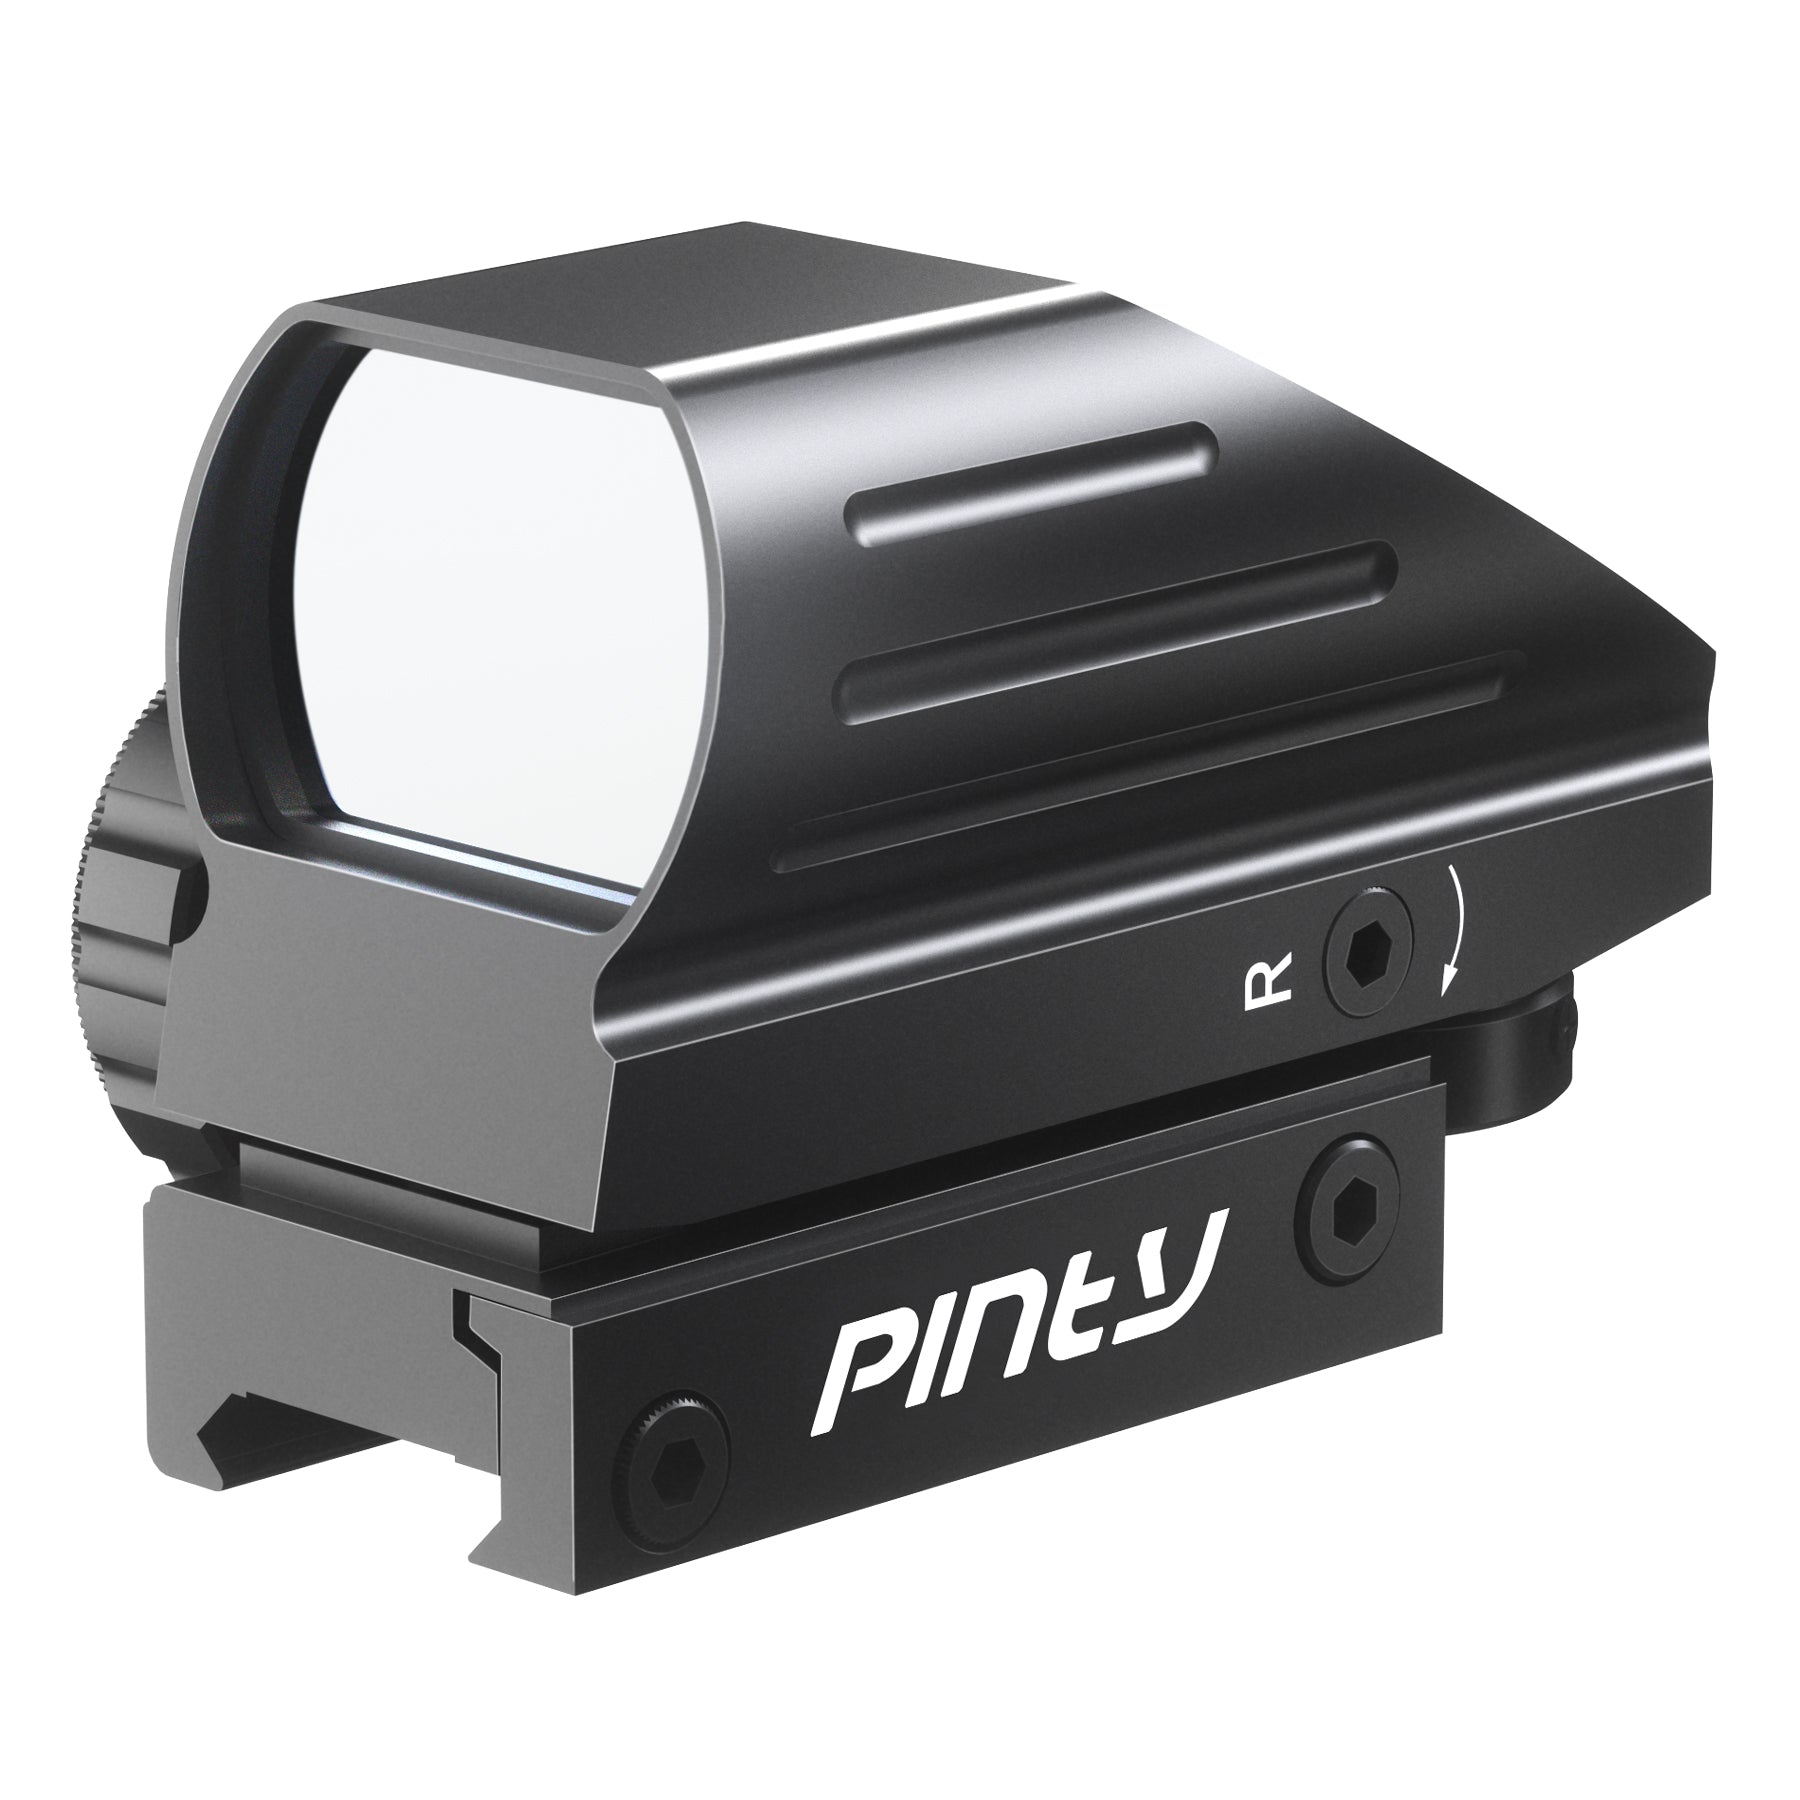
Pinty Nova 4-in-1 Hand Gesture Reticle Dot Sight
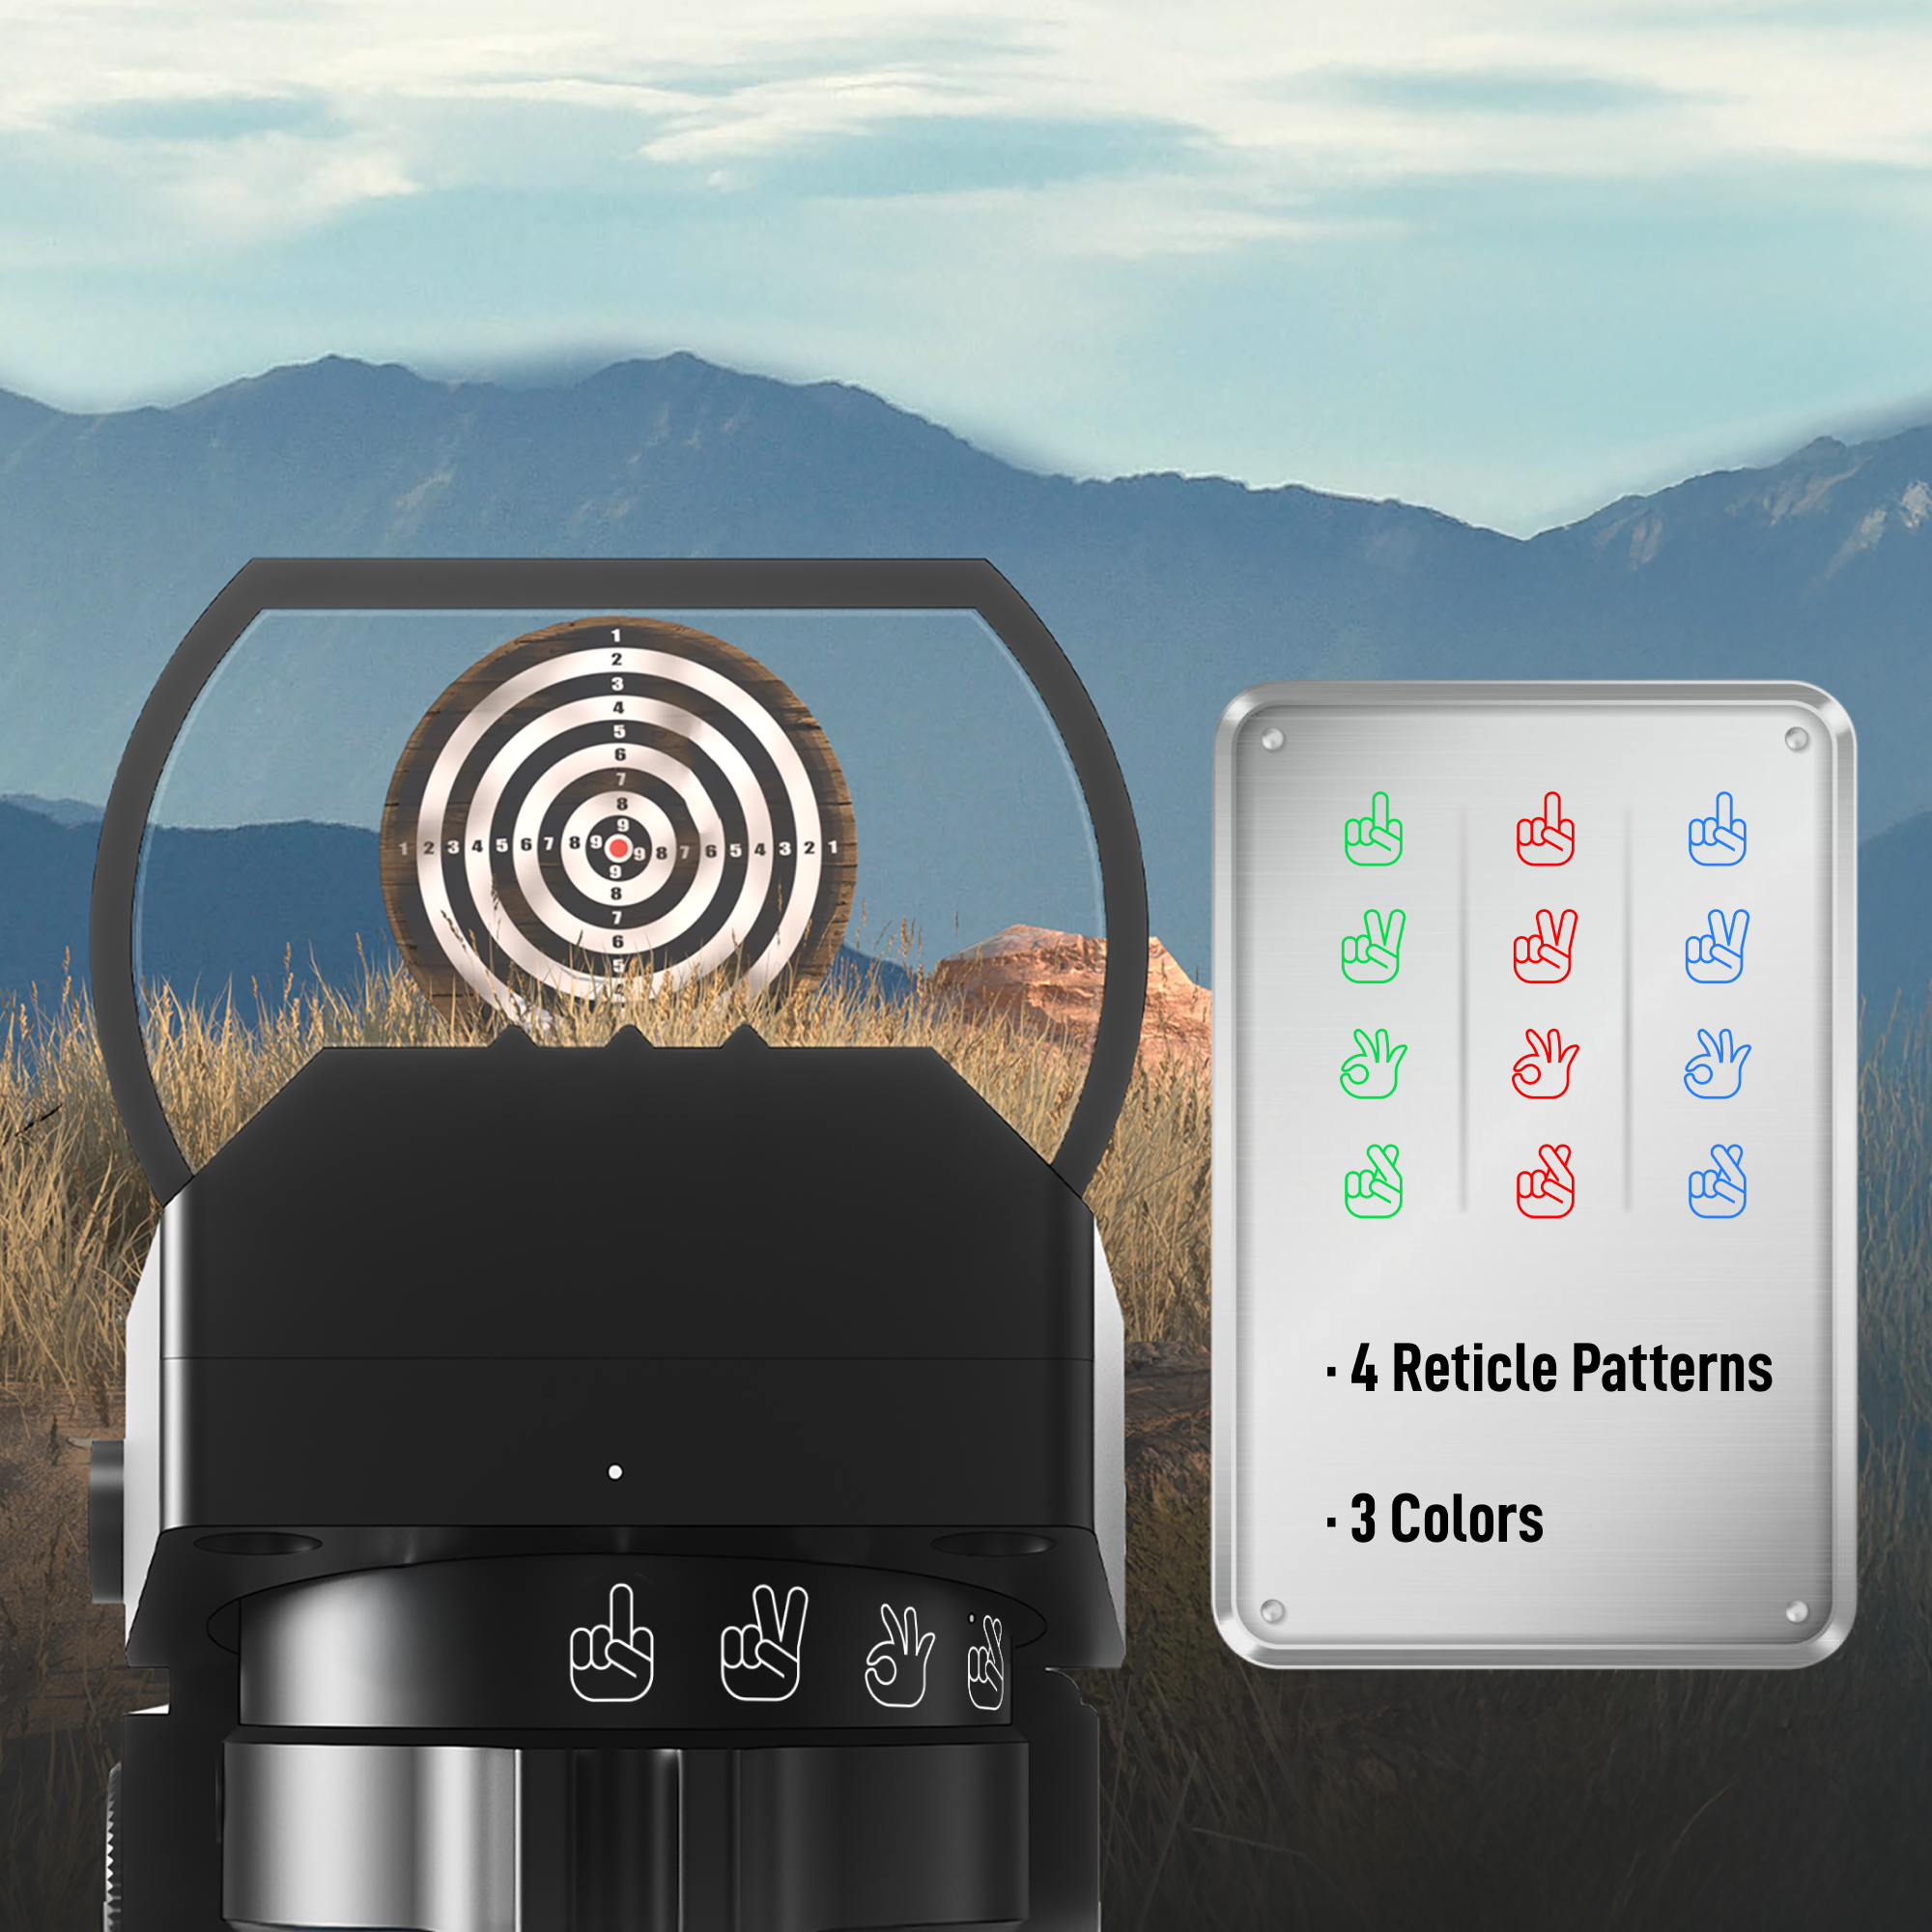
Pinty Nova 4-in-1 Tactical Reticle Dot Sight
Pinty Nova 4-in-1 Limited Edition Dot Sight
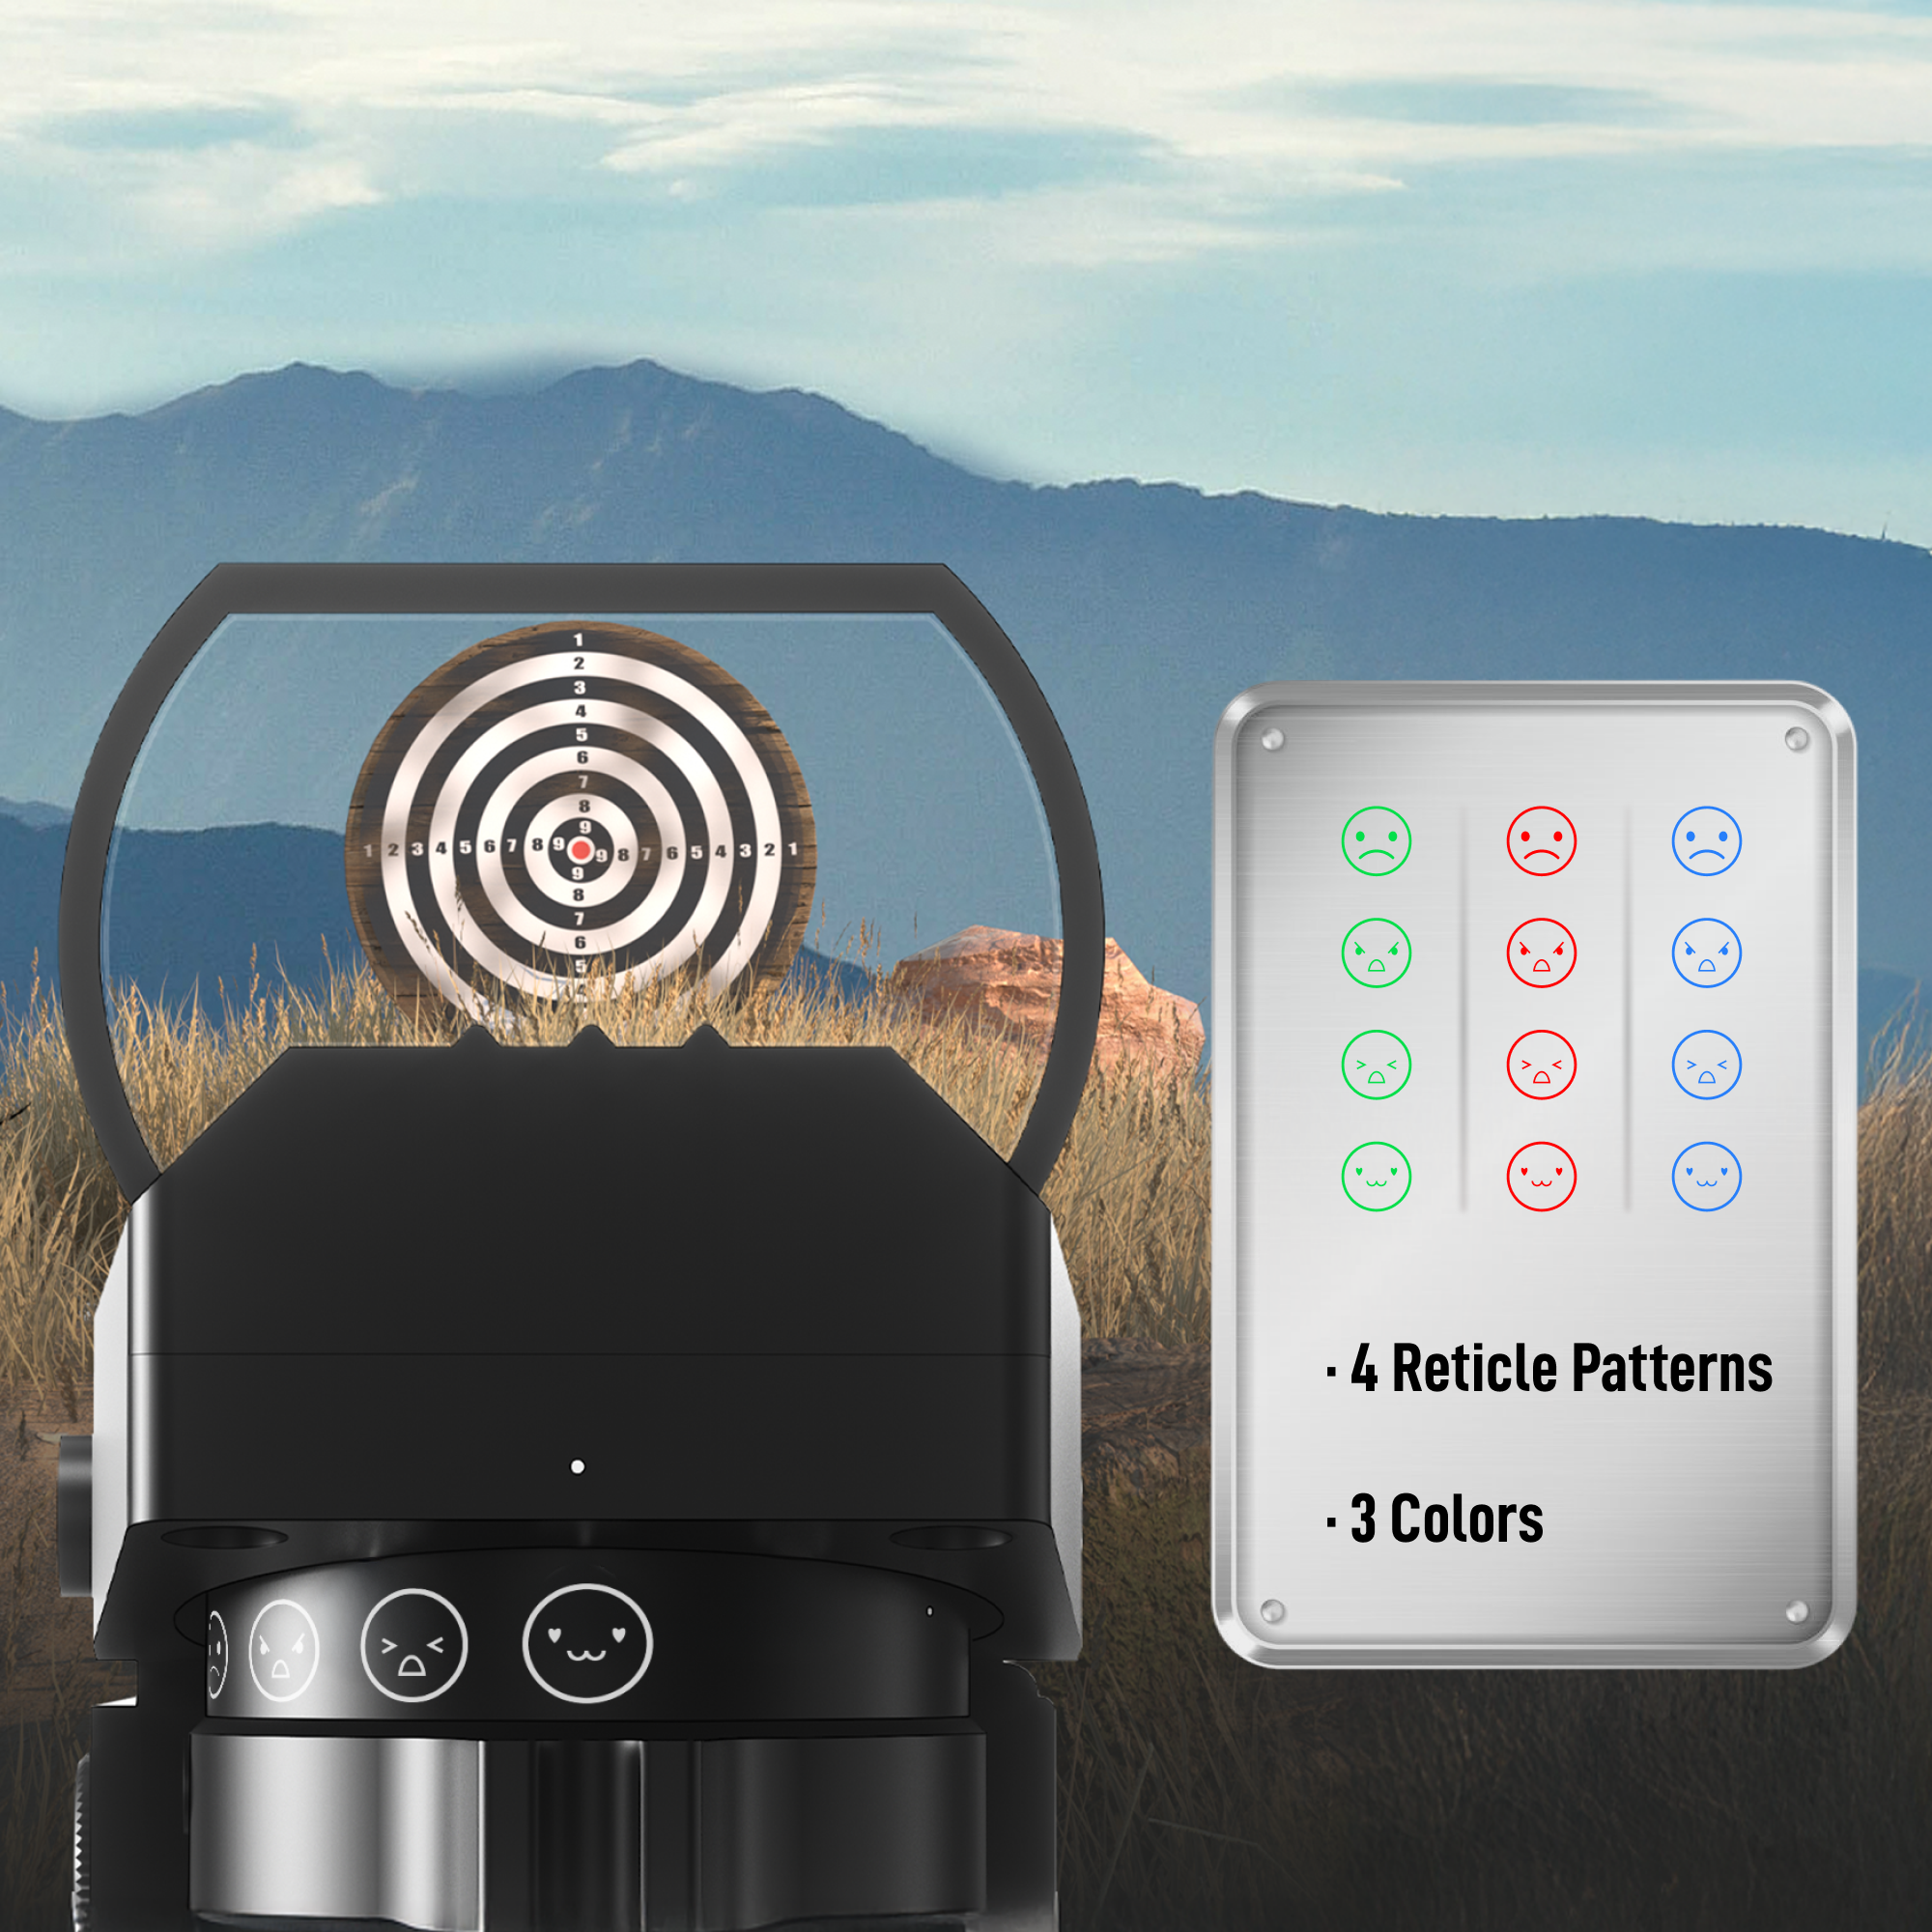
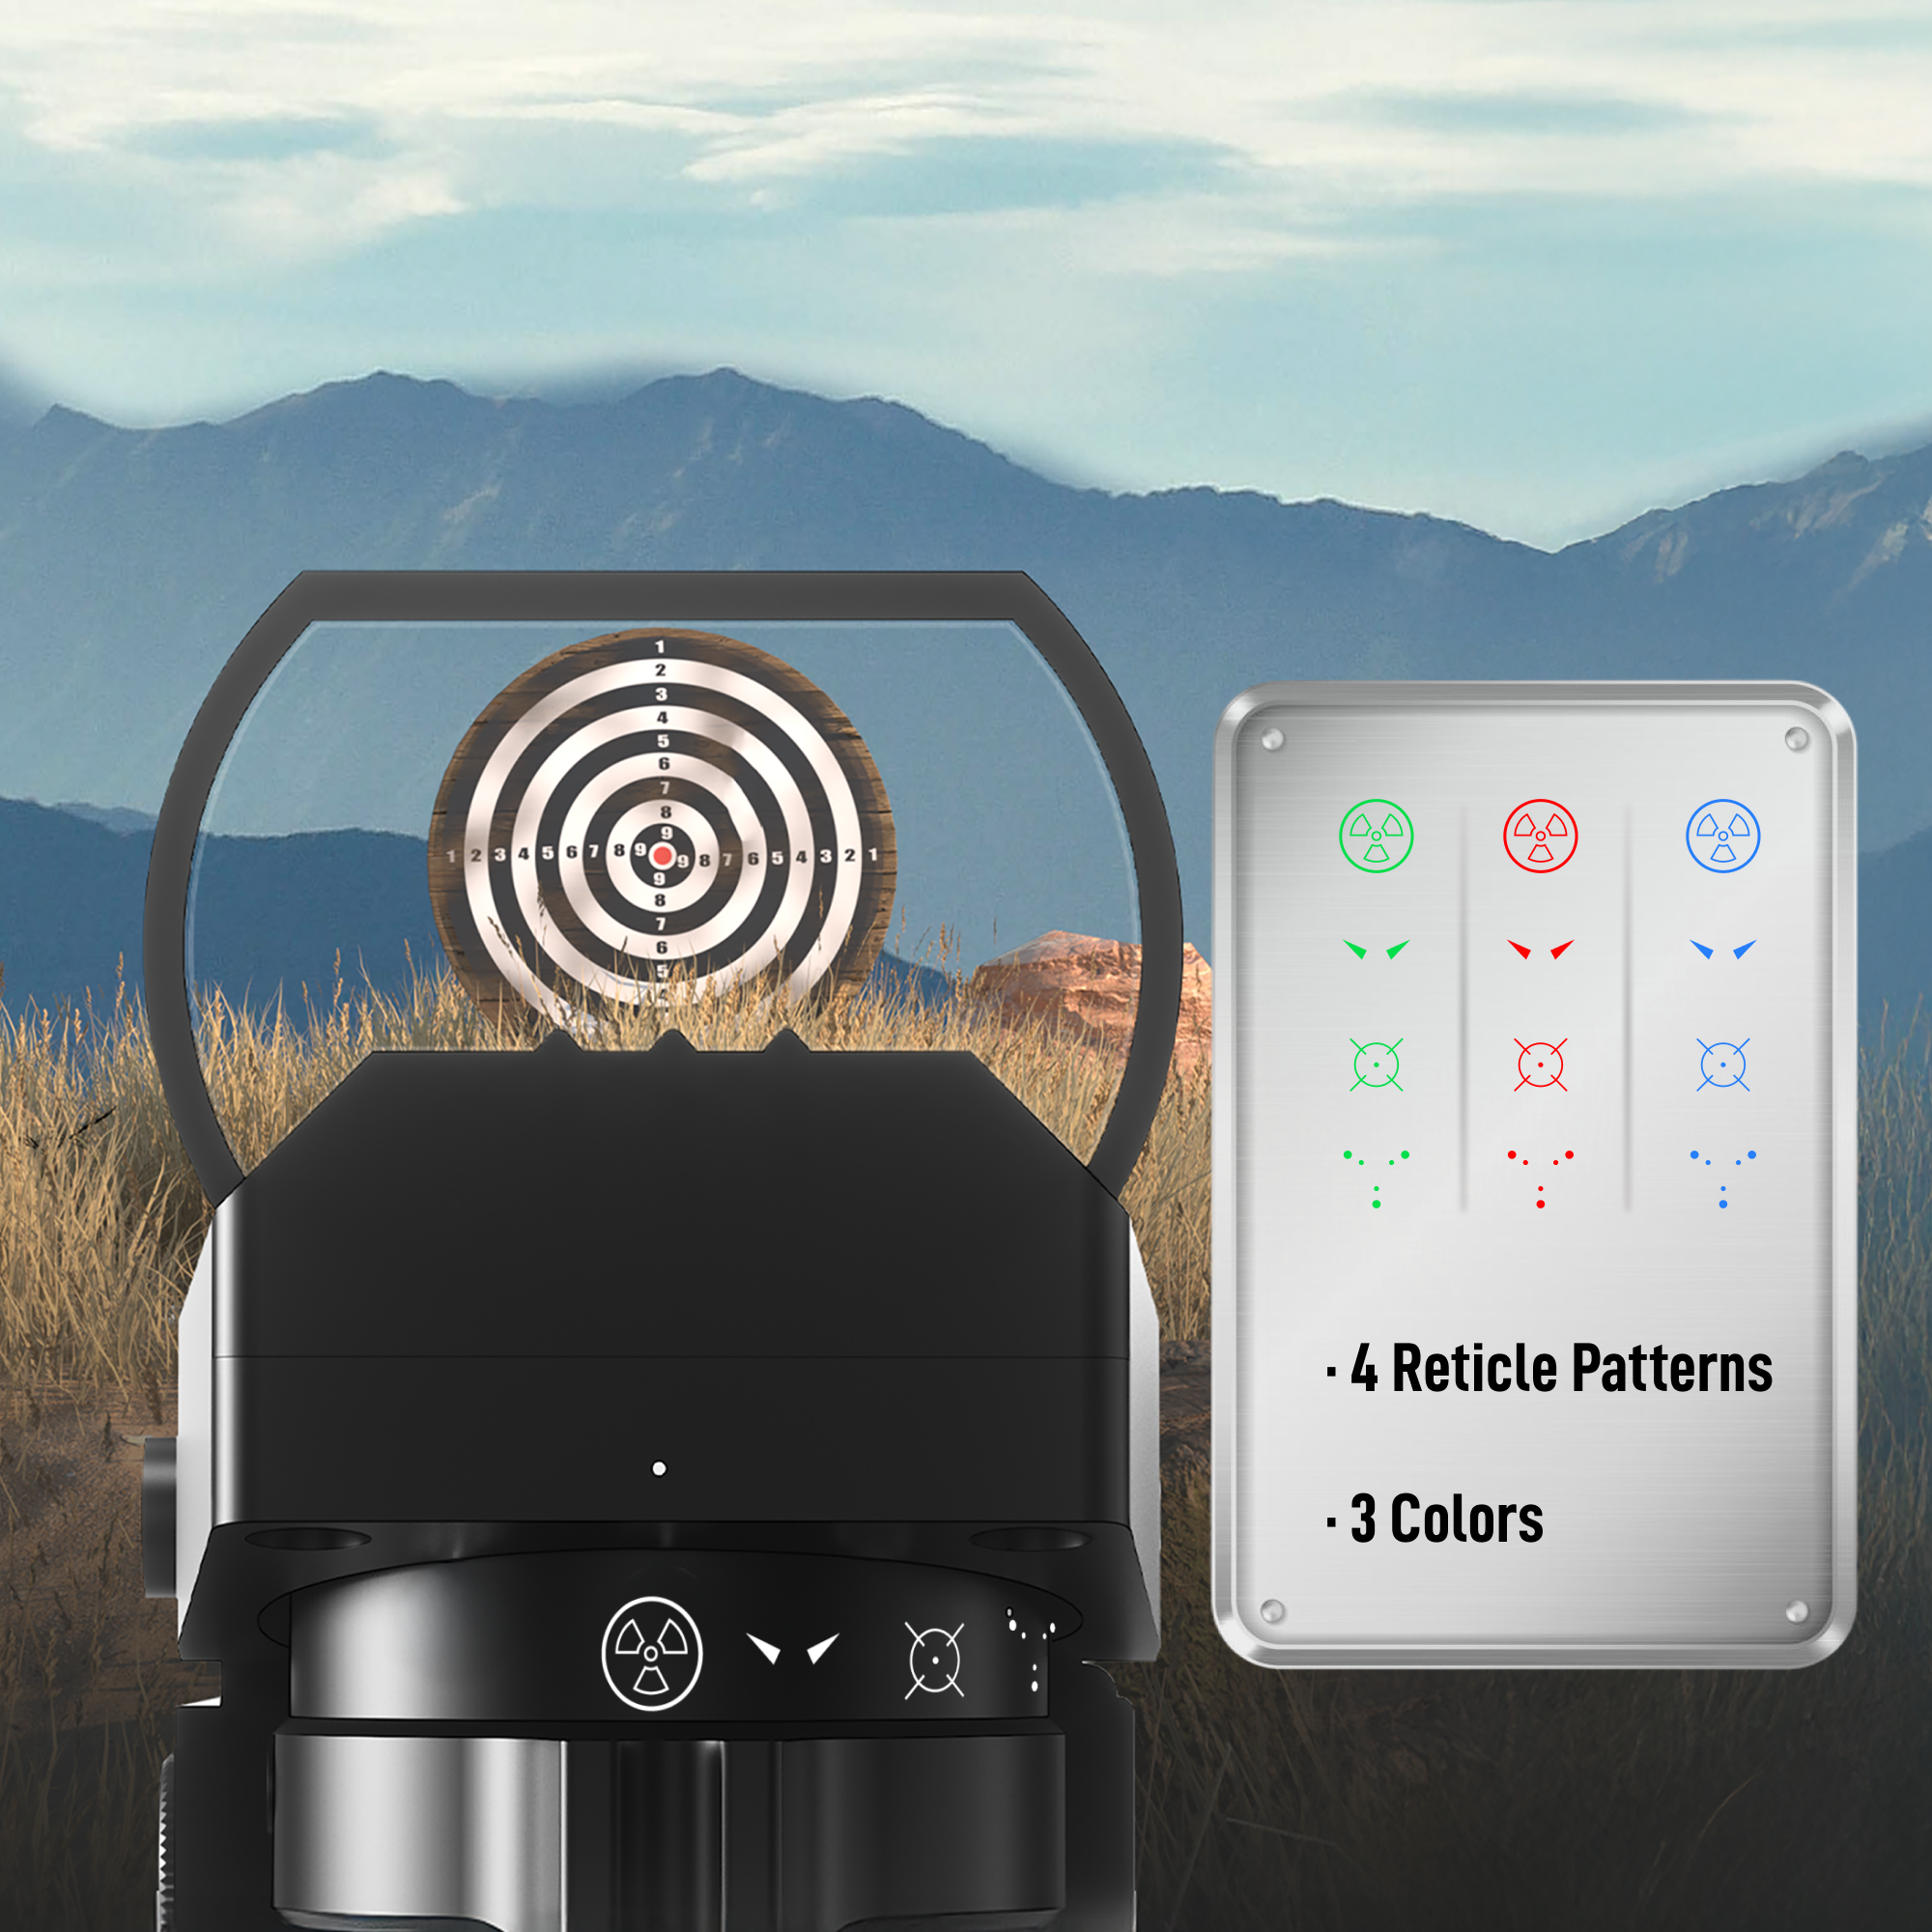
Pinty Nova 4-in-1 Emoji Reticle Dot Sight
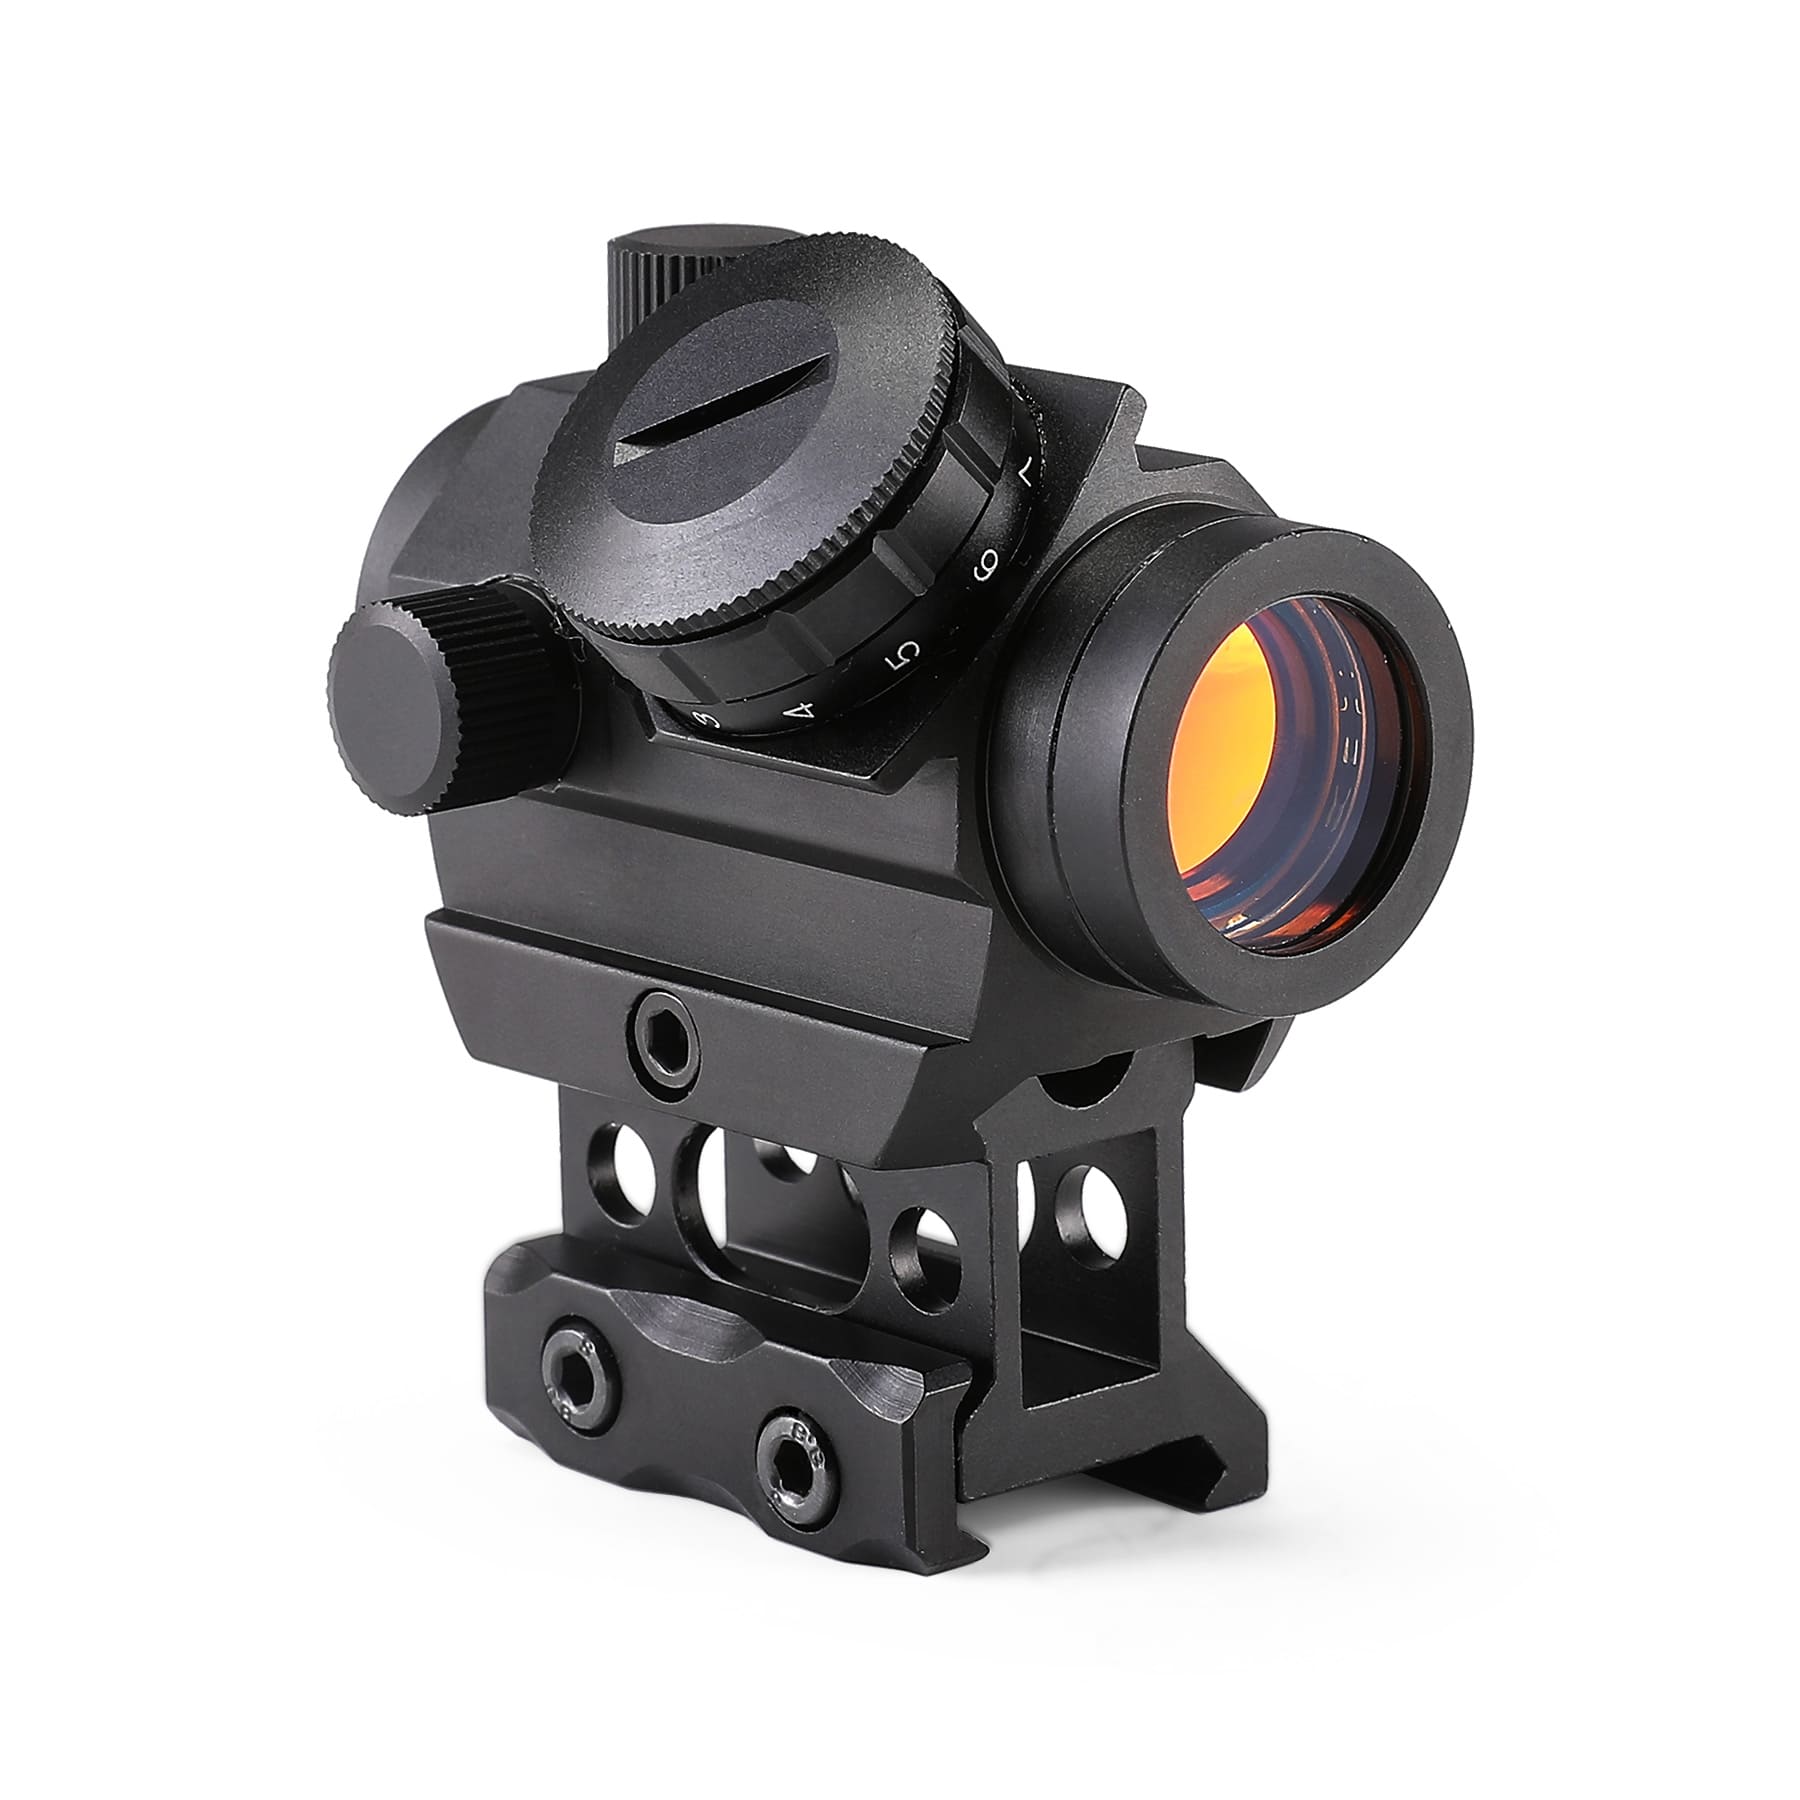
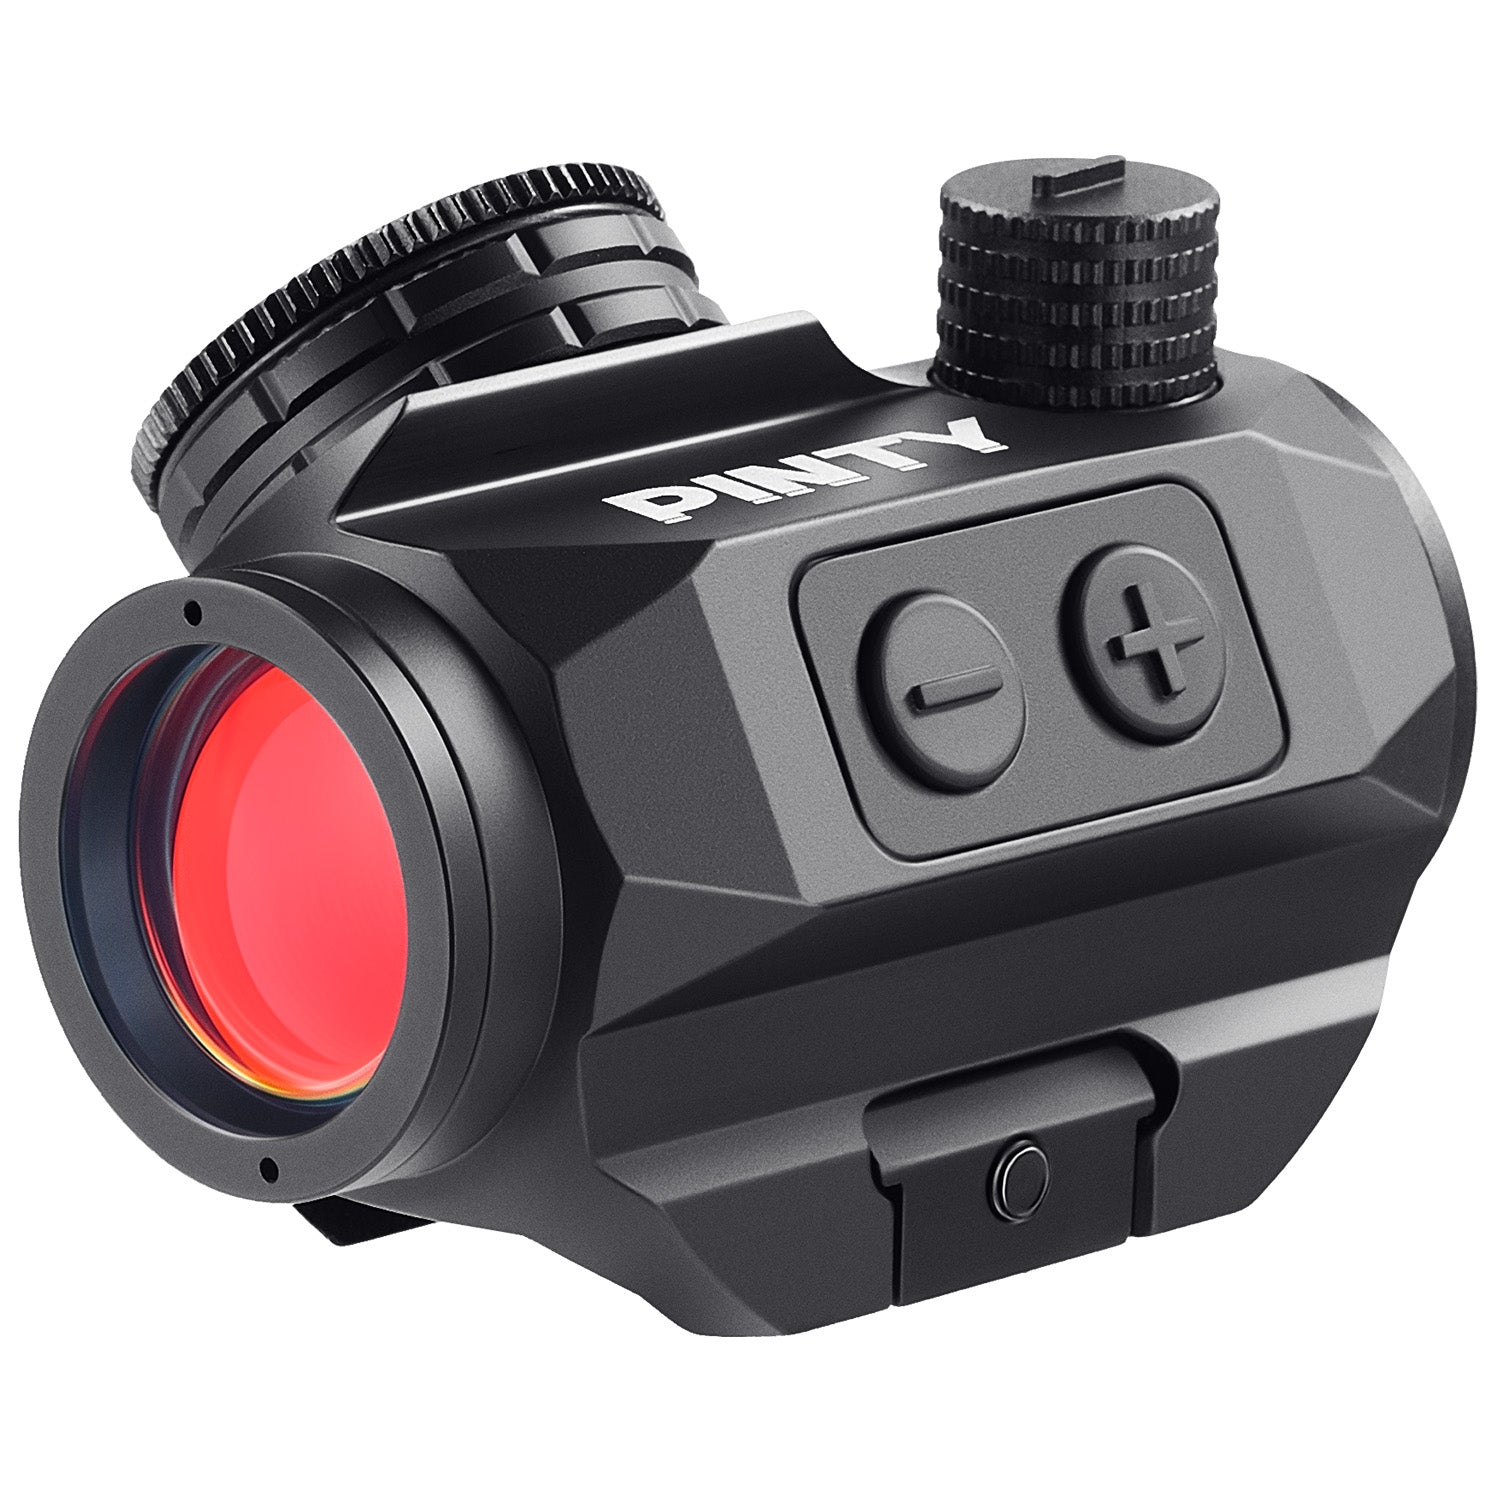
Pinty Nova 1x20mm 2MOA Red Dot Sight
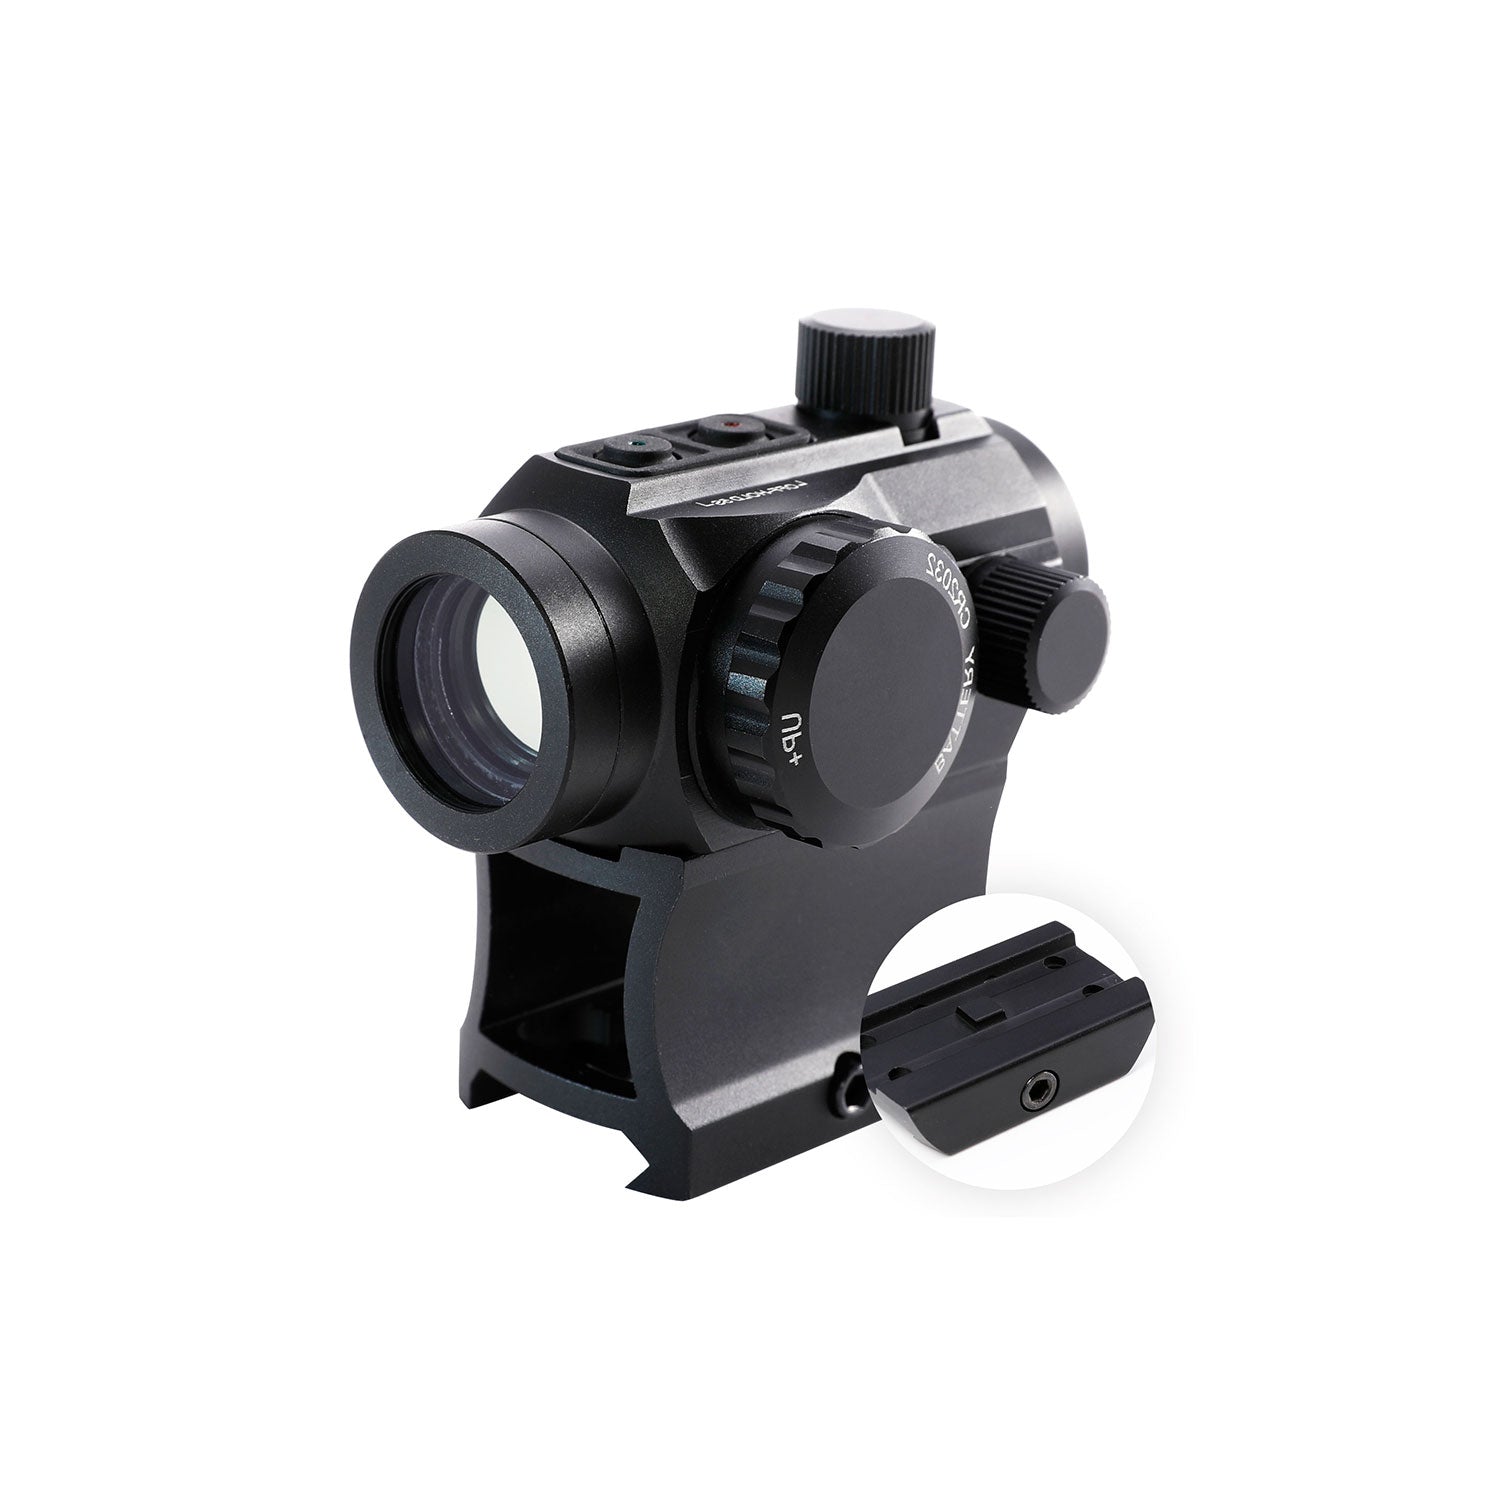
Pinty Nova 1x20mm 4 MOA Red Dot Sight
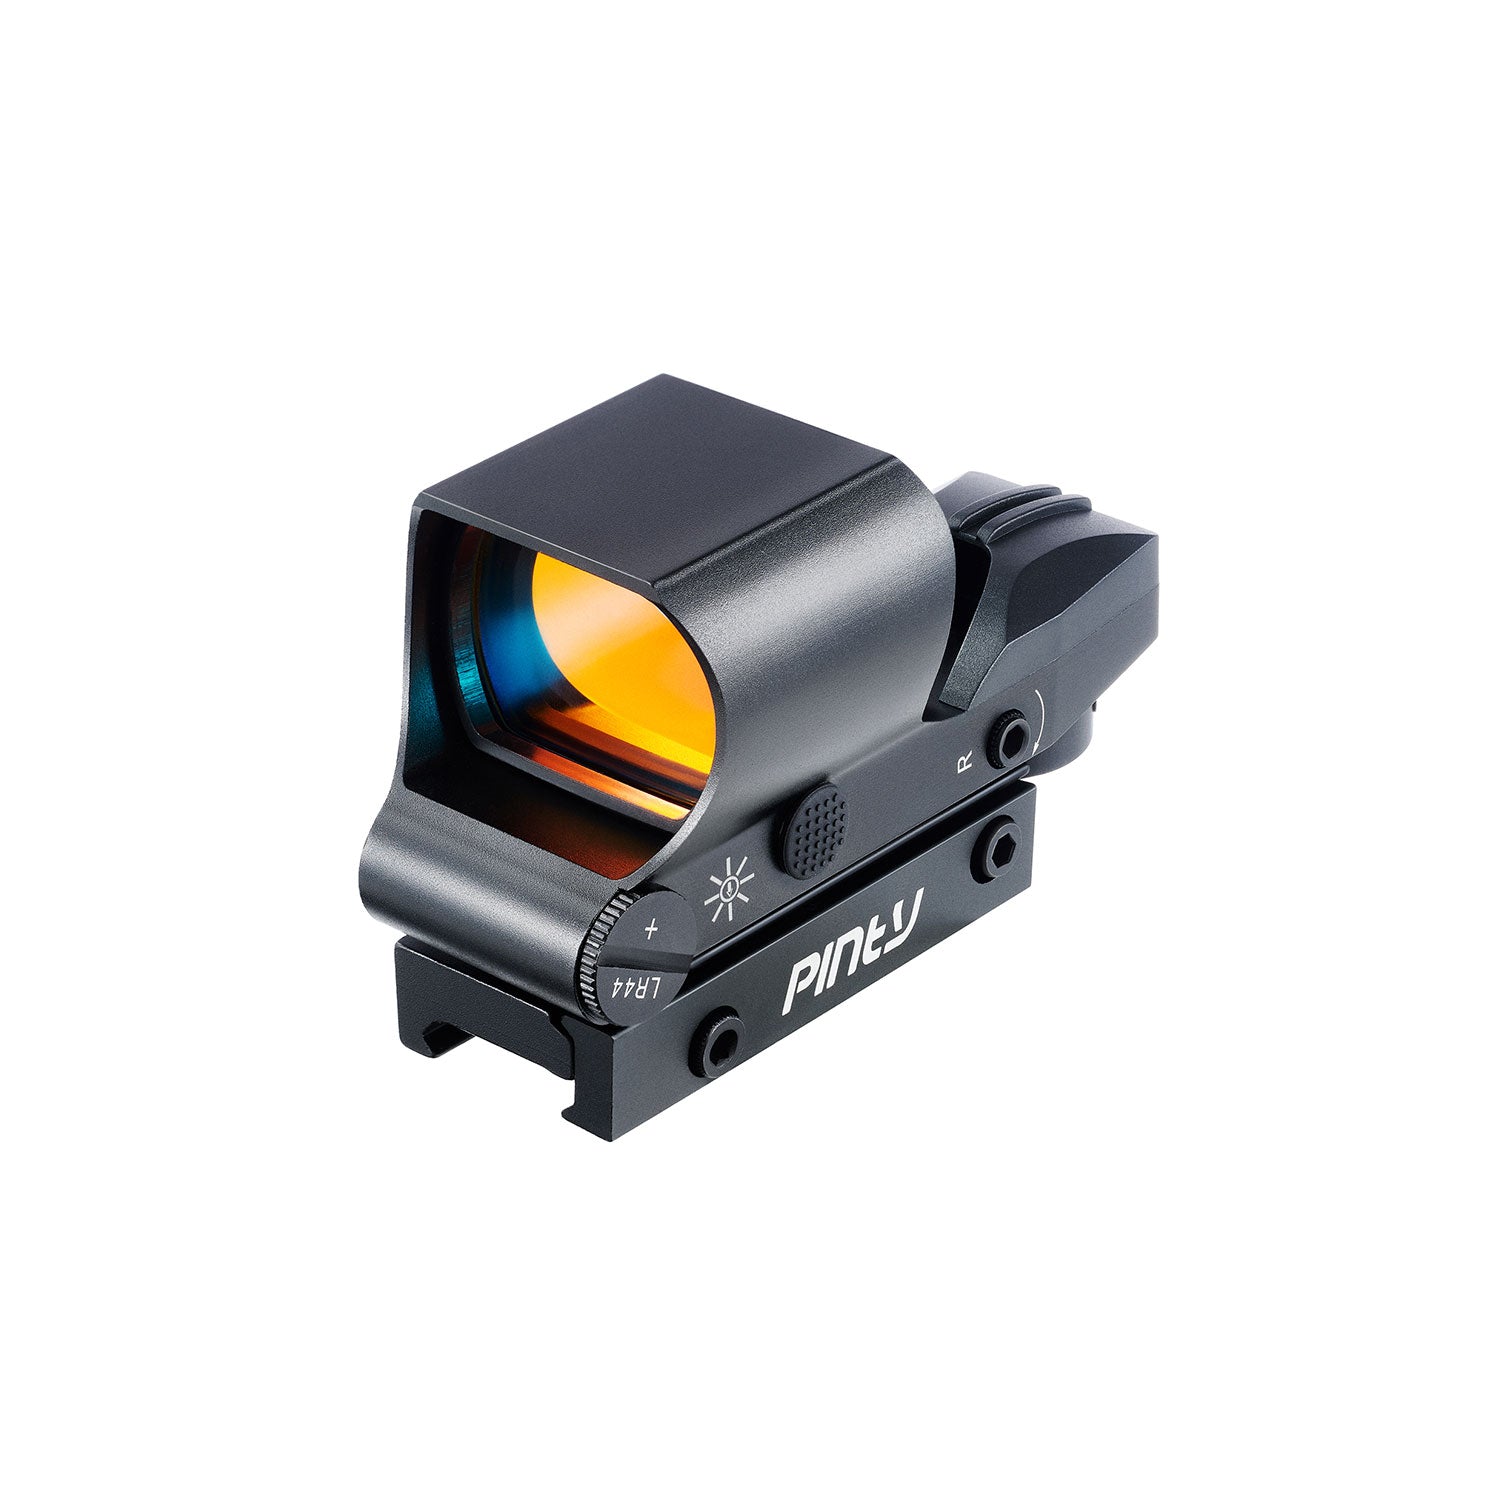
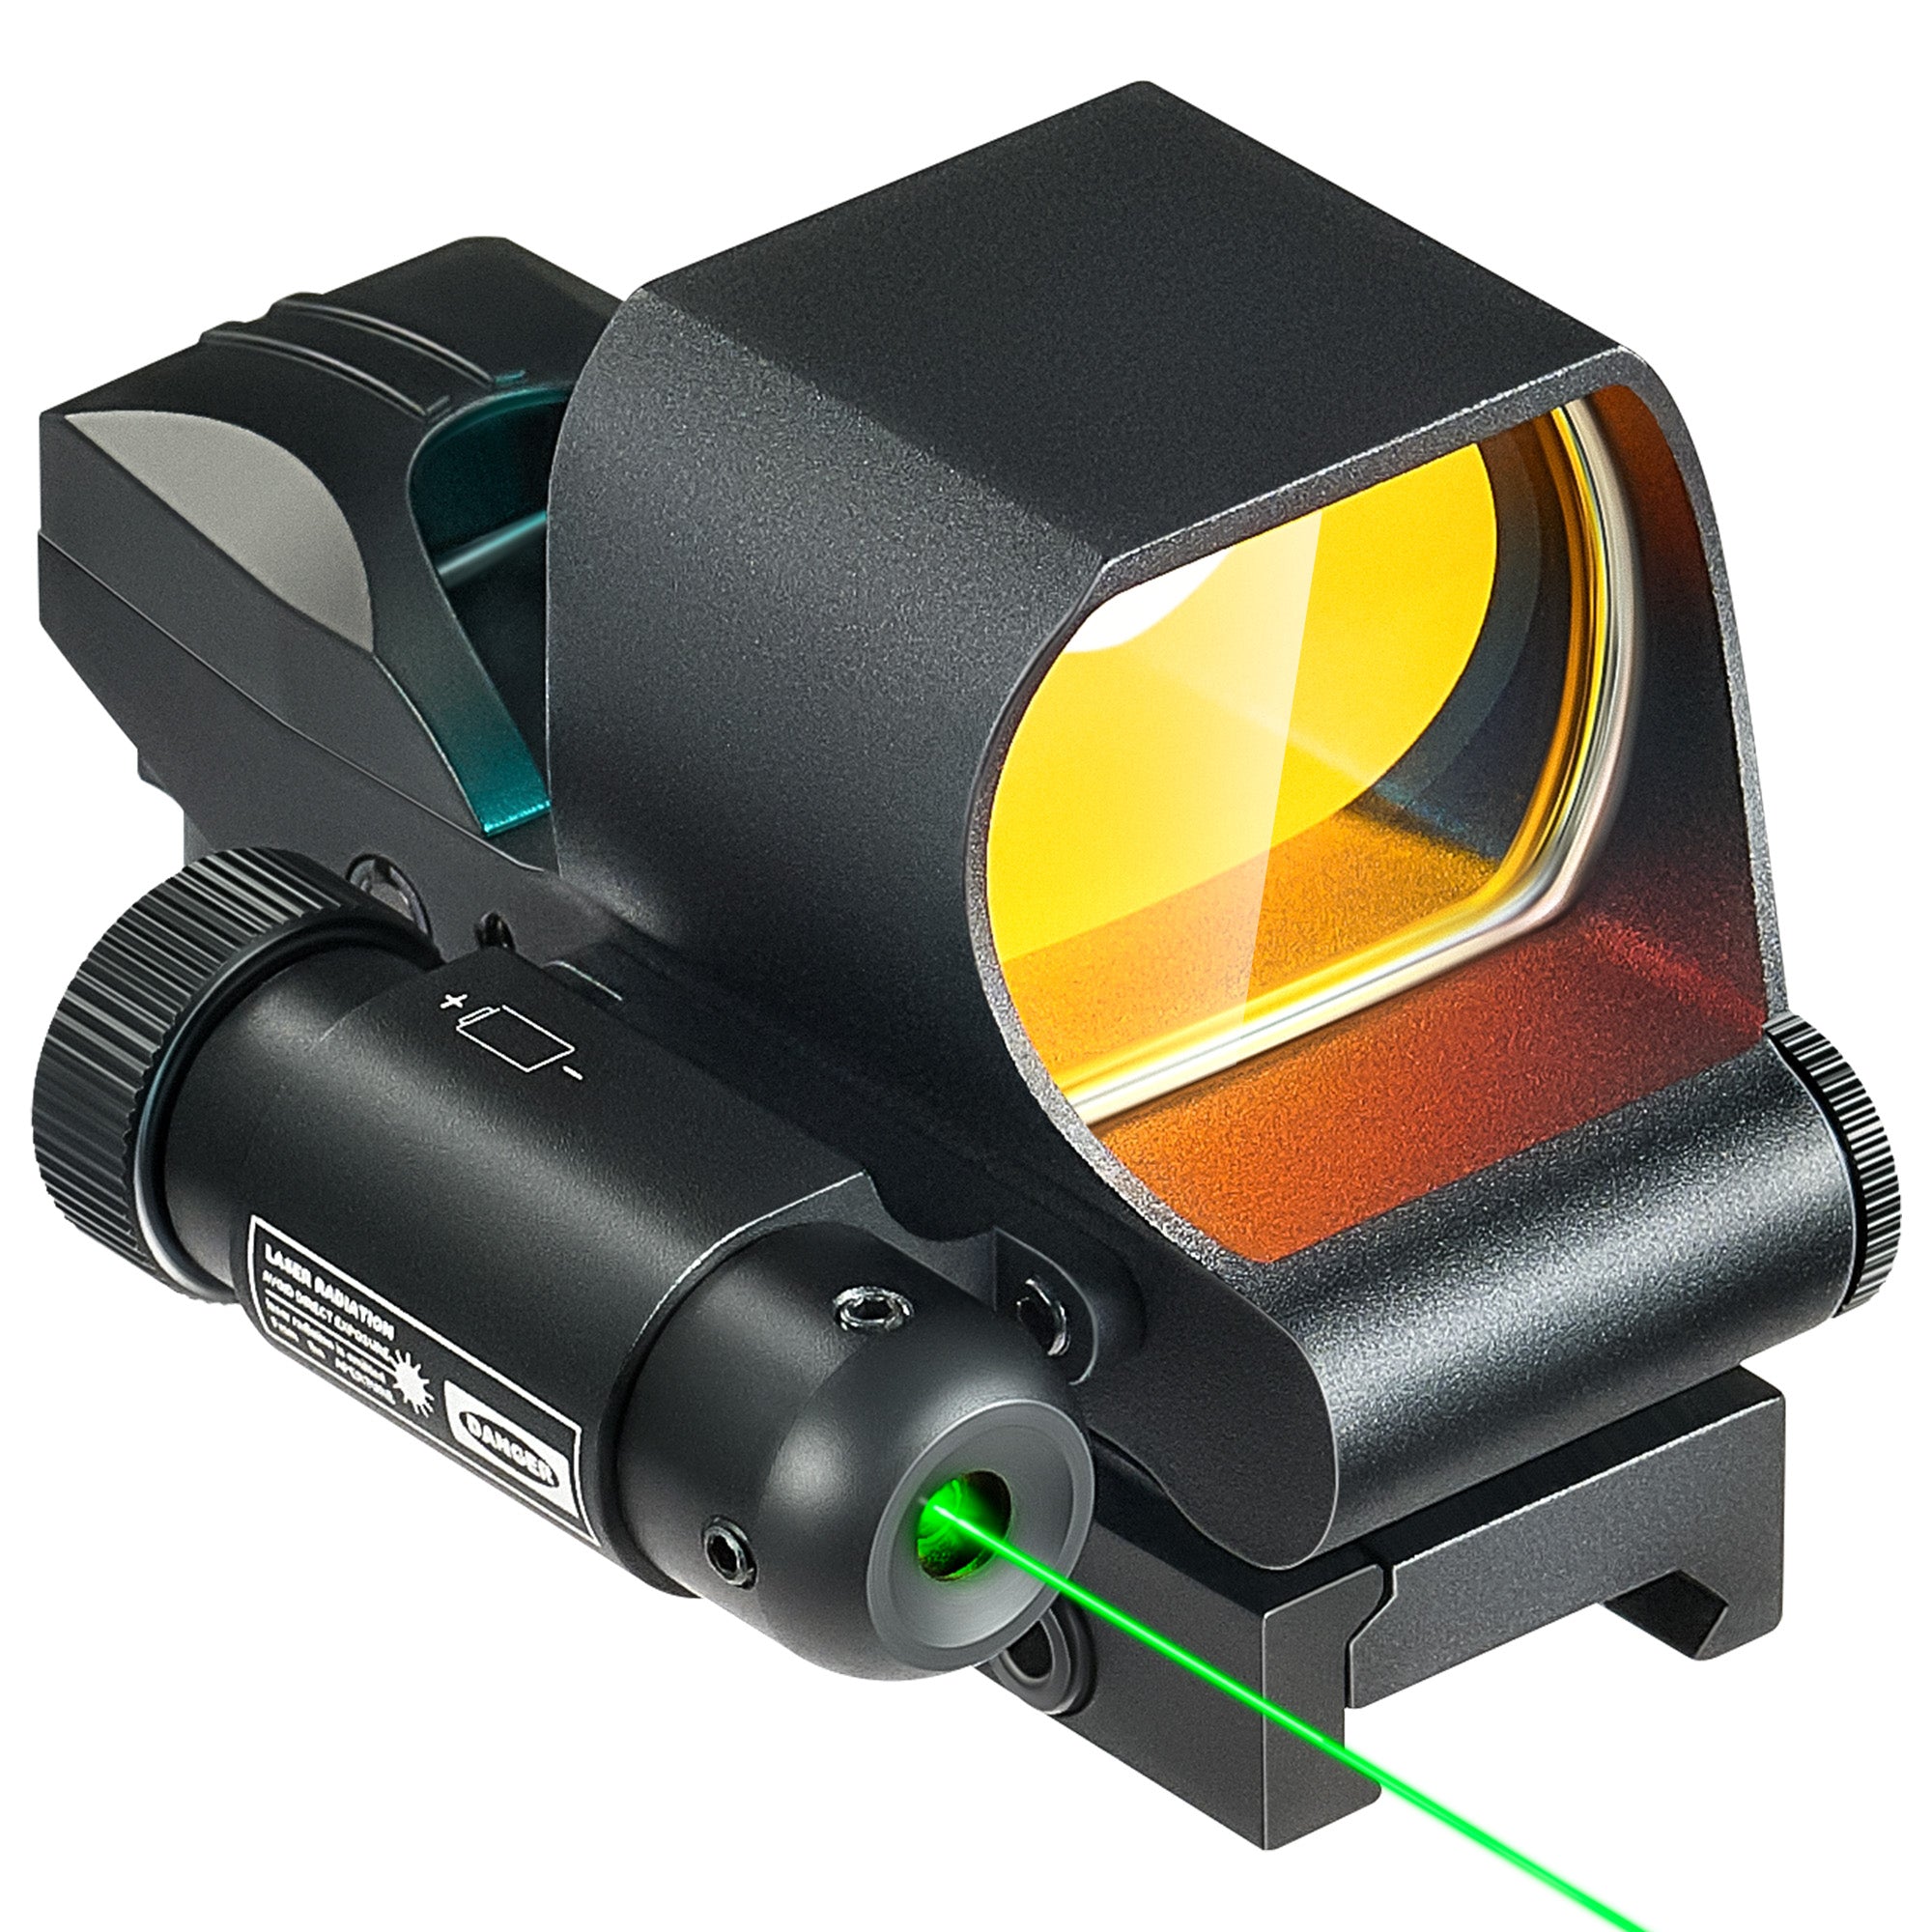
Pinty Nova 1x28x40mm Red Dot Sight
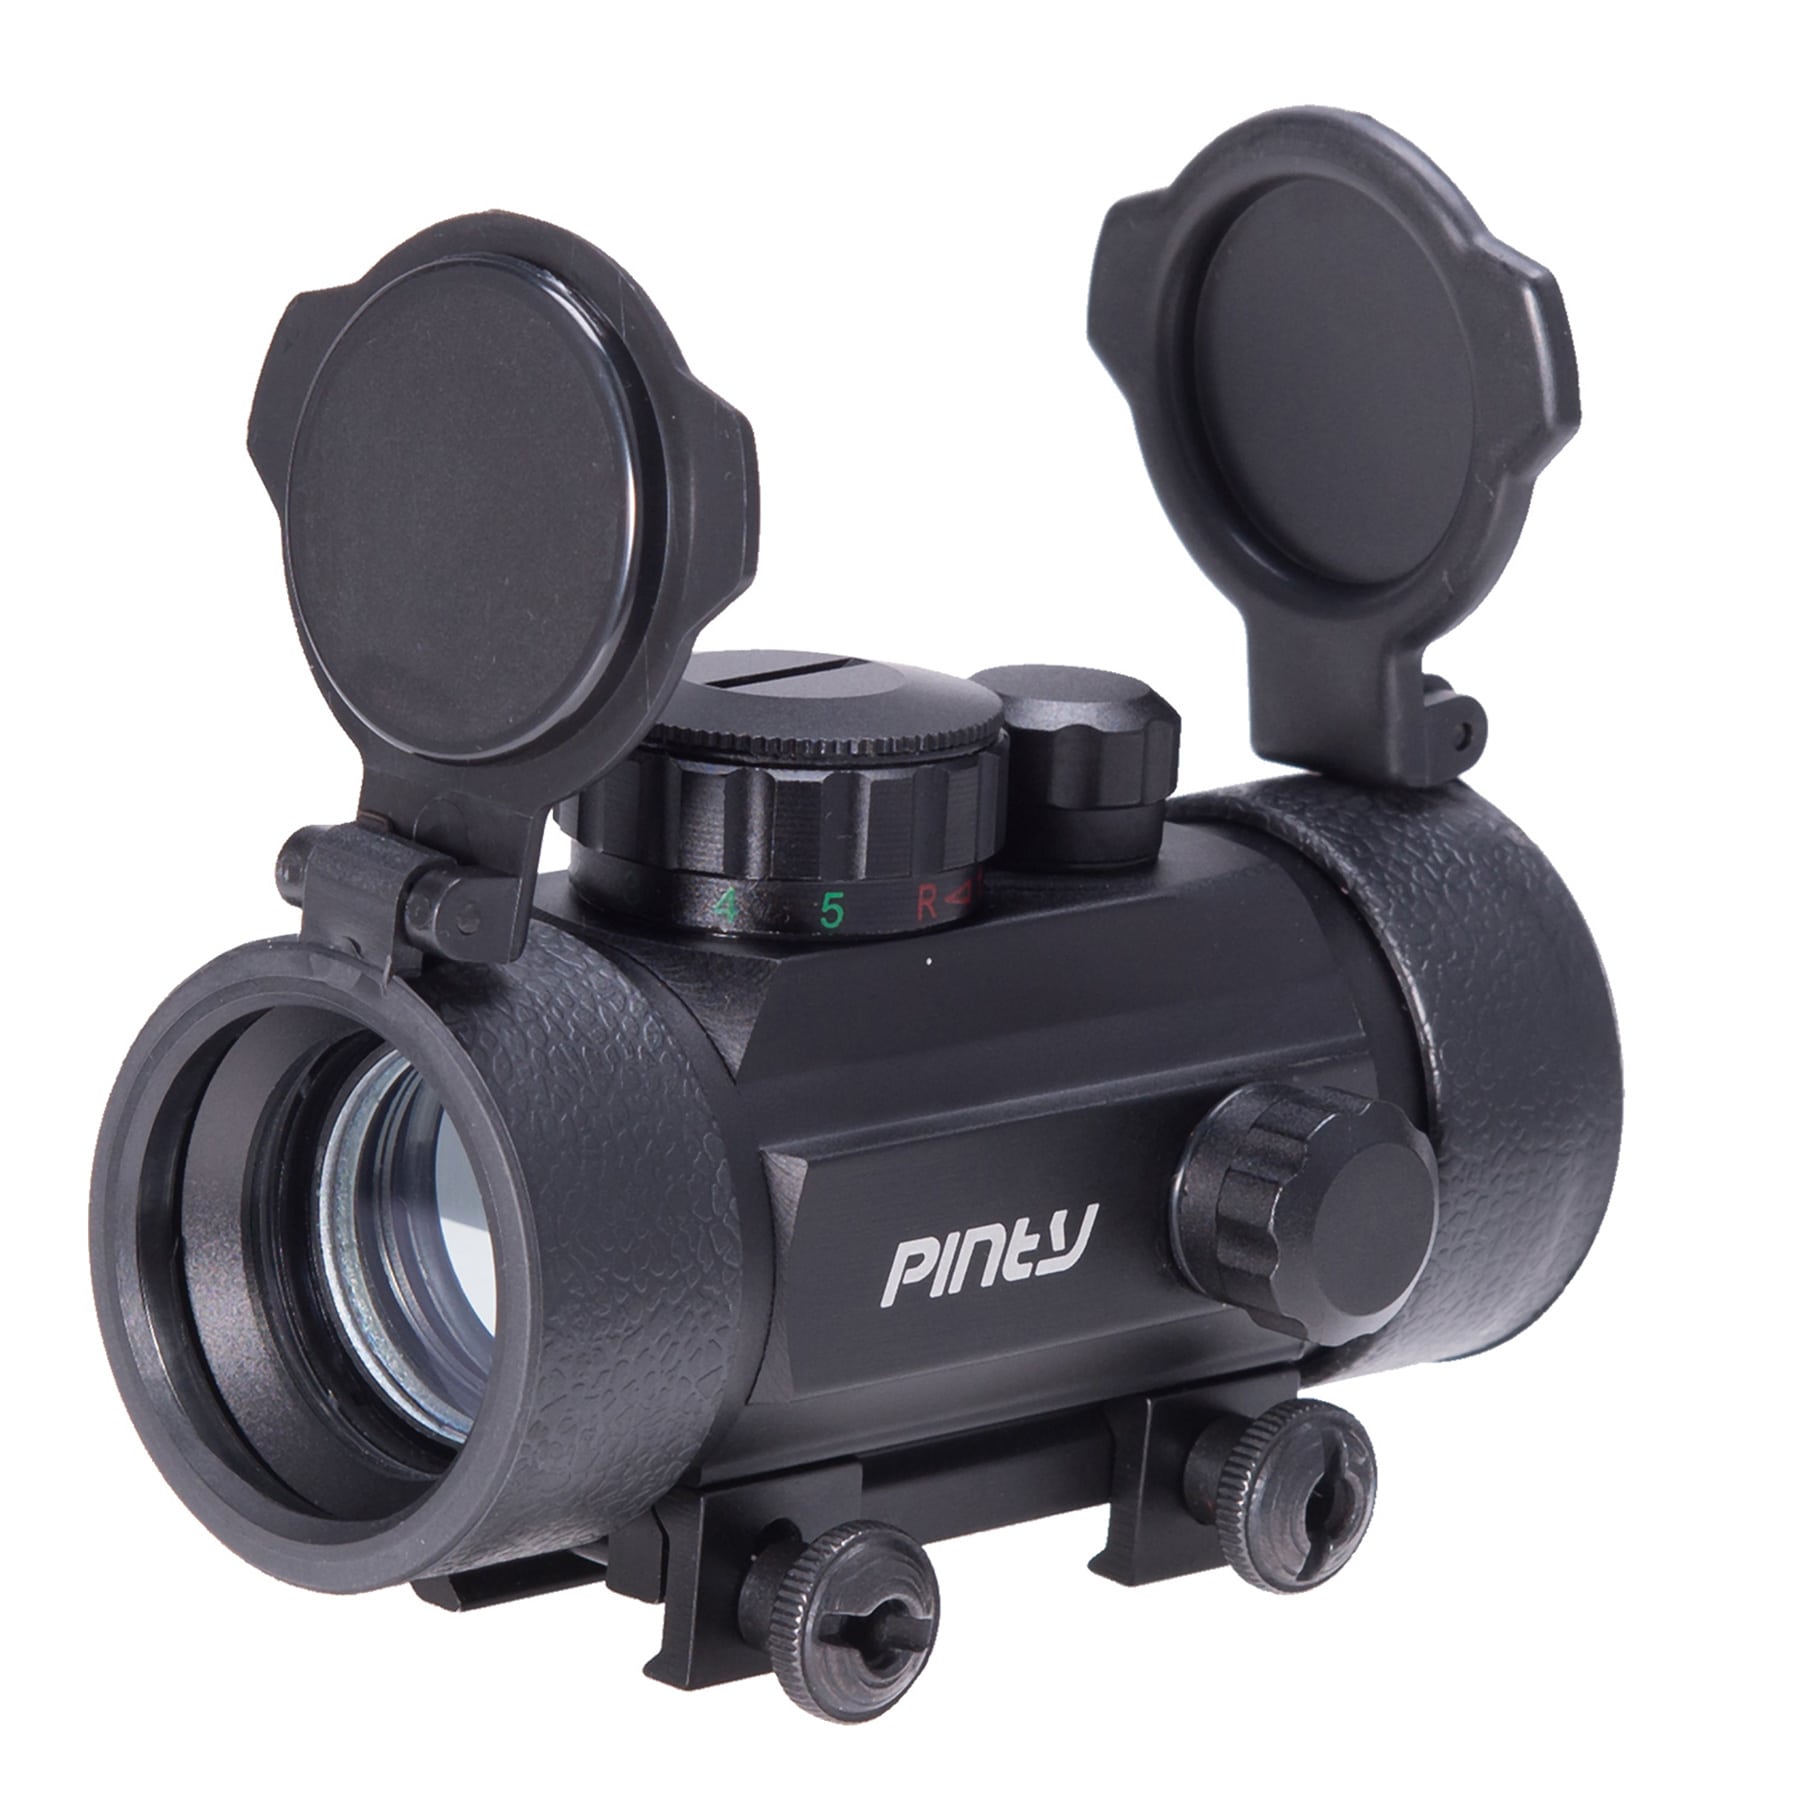
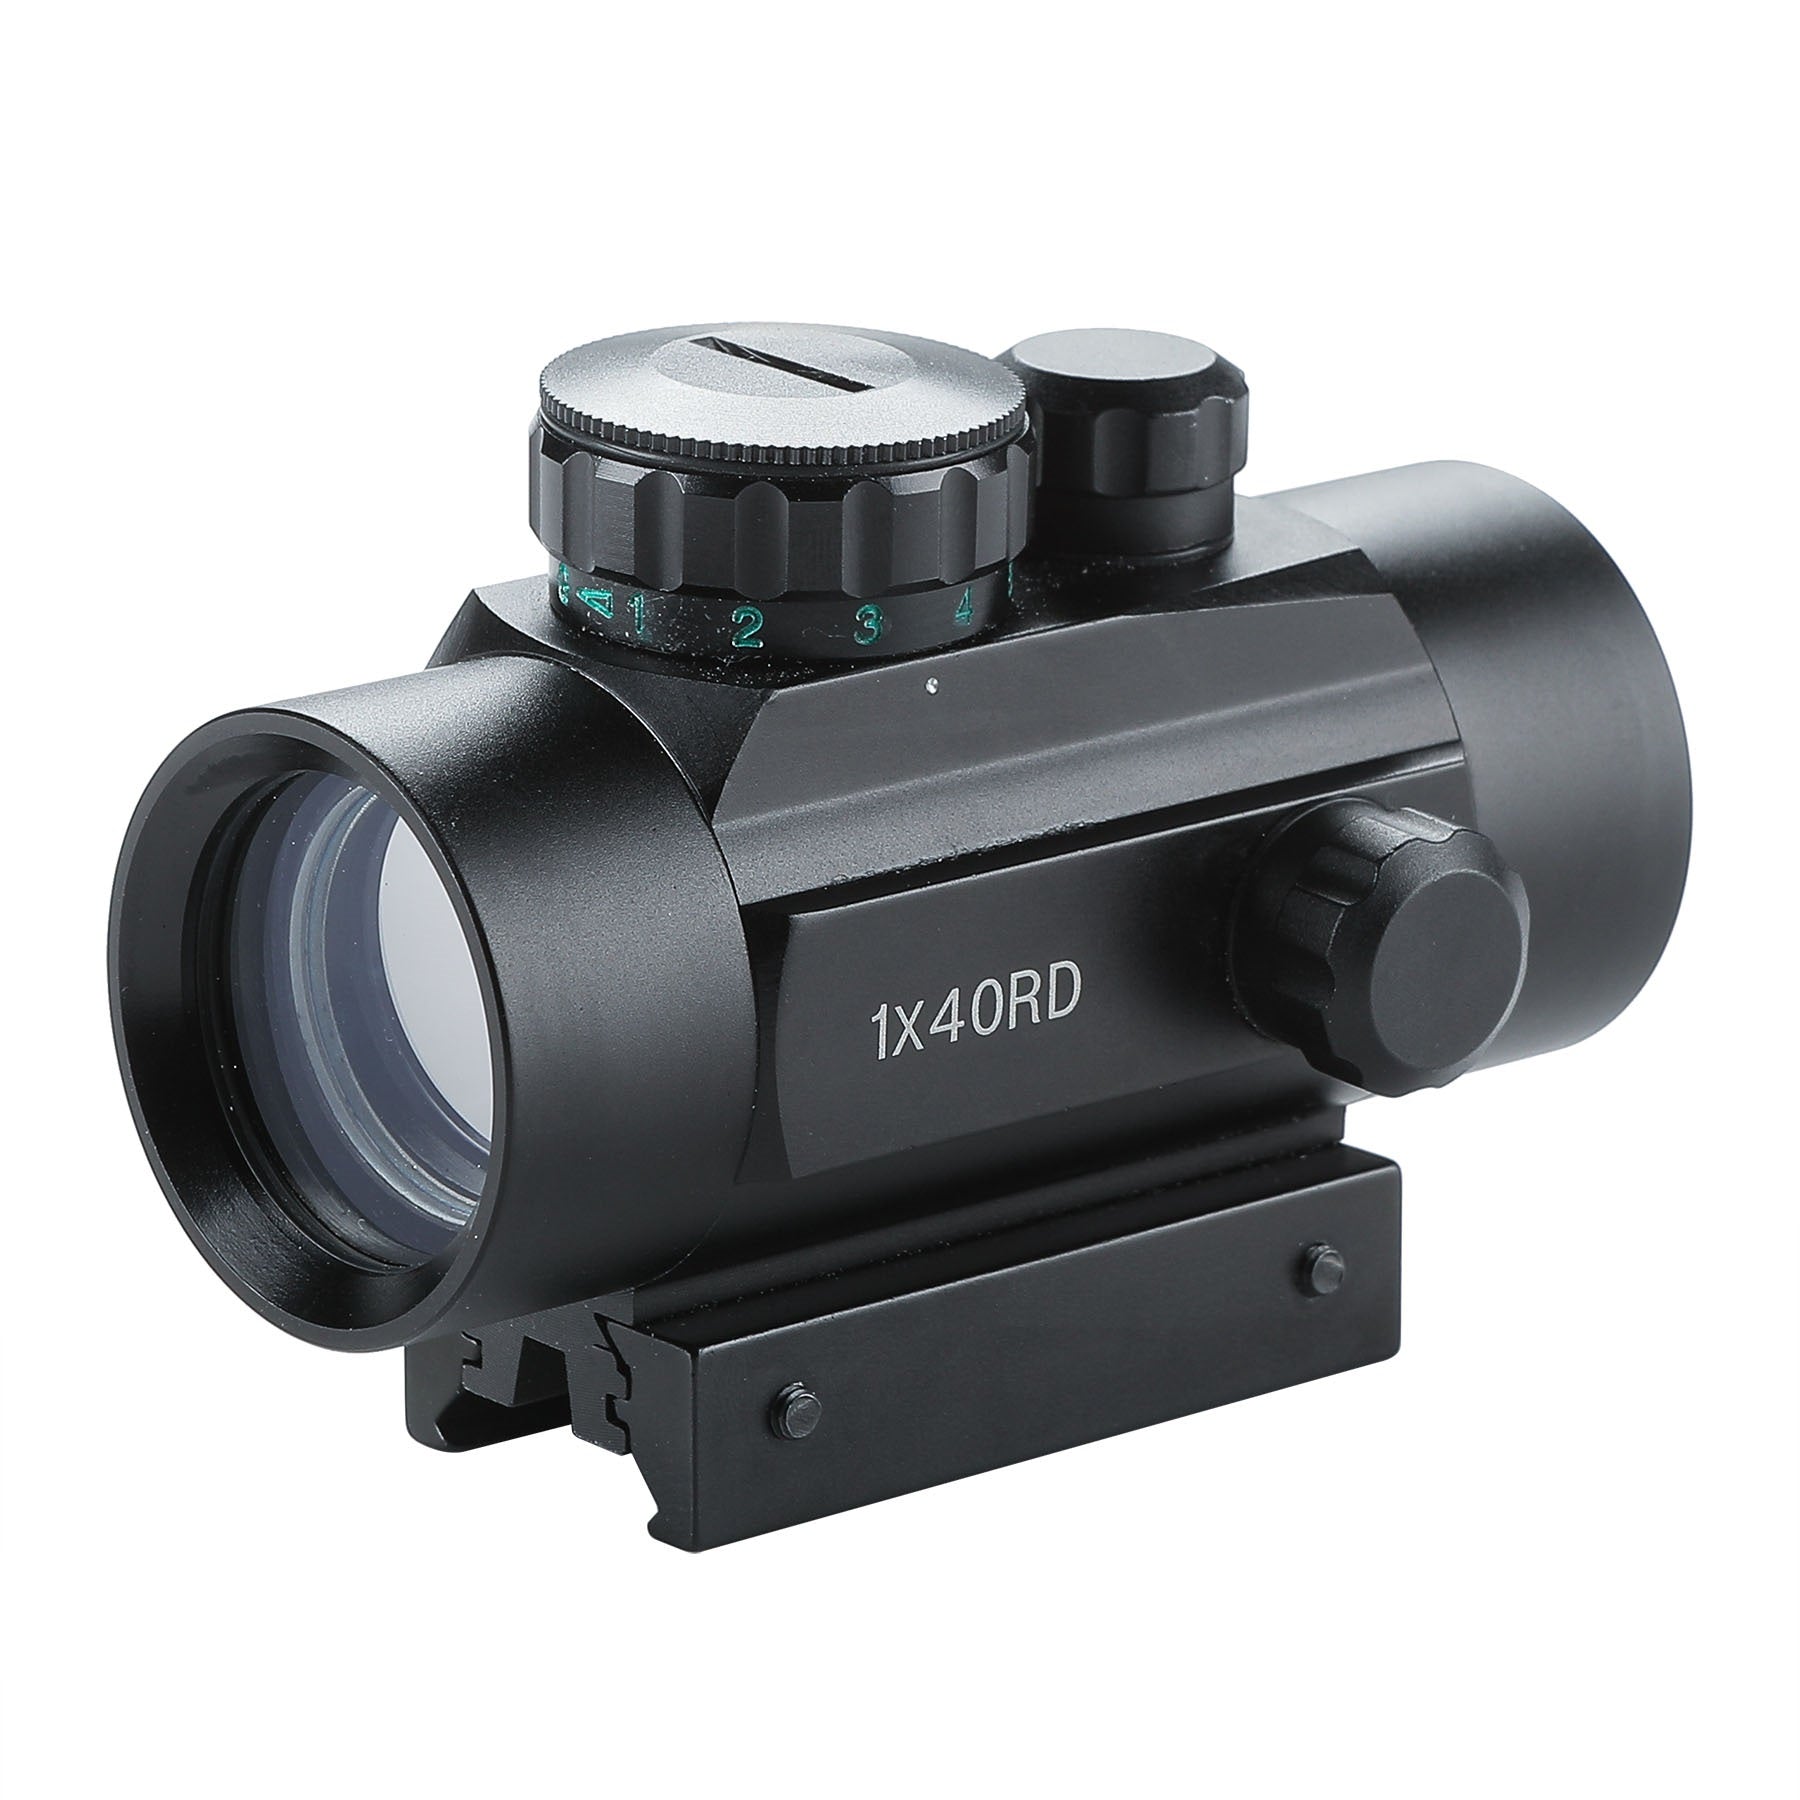
Pinty Nova 1x30mm Red&Green Dot Sight
Compare Optic Models

Material
6063 Aluminum Alloy
Material
6063 Aluminum Alloy
Material
6063 Aluminum Alloy
Tube Diameter
30 mm
Tube Diameter
30 mm
Tube Diameter
34 mm
Reticle Adj. per Click
0.5 MOA
Reticle Adj. per Click
0.5 MOA
Reticle Adj. per Click
0.5 MOA
Windage Adjustment
160 MOA
Windage Adjustment
160 MOA
Windage Adjustment
160 MOA
Elevation Adjustment
160 MOA
Elevation Adjustment
160 MOA
Elevation Adjustment
160 MOA
Eye Relief
85 - 95 mm
Eye Relief
85 - 95 mm
Eye Relief
85 - 90 mm
Field of View @ 100 yd
37.5 - 5.6 m @ 100 m
Field of View @ 100 yd
37.5 - 4.4 m @ 100 m
Field of View @ 100 yd
37.5 - 2.8 m @ 100 m
Reticle Color
Red & Green
Reticle Color
Red & Green
Reticle Color
Red & Green
When It Matters, We’re There.
Responsive Customer Support
Get fast, reliable assistance whenever you need help.
Warranty Protection Coverage
Every product is backed by a clear warranty policy.
Hassle-Free Replacement
Simple and straightforward solutions when issues arise.
Red Dot vs Green Dot
While the only physical difference between a red dot and a green dot sight is the wavelength of the light being projected, that shift in color dramatically alters how your brain processes the reticle, especially under varying lighting conditions.
Red Dots: The Battery-Saving Classic
Red LEDs are the industry default for a reason. Because red light is highly energy-efficient to generate, red dots boast legendary battery life—often lasting years on a single coin cell. They are widely manufactured, making them highly accessible and generally more budget-friendly.
Mechanically, red dots excel in low-light, nighttime, or urban tactical settings because red light doesn't aggressively disrupt your eye's natural night vision. However, red light can wash out or feel strained to track when shooting in intense, direct midday sunlight or against desert backdrops.
Green Dots: The High-Contrast Alternative
Green dot sights exploit a quirk of human biology: our eyes are naturally evolved to be far more sensitive to green light wavelengths than red. This means a green reticle will appear noticeably brighter, crisper, and easier for your brain to acquire, even when set to the exact same power output as a red dot.
- Daylight Mastery: Green dots excel in bright, direct outdoor sunlight, making them highly popular for daytime competition or range training.
- The Astigmatism Relief: Many shooters who suffer from an astigmatism note that green reticles appear much sharper and exhibit less of a "starburst" blur than red alternatives.
However, green light requires significantly more electronic power to project, meaning green dots suffer from reduced battery lifespans compared to their red counterparts. They can also carry a slight premium price tag and can accidentally blend into highly dense, lush forest environments where the backdrop is entirely green foliage.
How to Choose a Red Dot Sight
Choosing a red dot sight replaces traditional iron sights with a single illuminated aiming point, making target acquisition faster and more intuitive. However, the perfect optic depends entirely on your firearm, shooting style, and environment. Selecting the right one requires balancing several key factors, starting with your specific platform and extending to how your own eyes interact with the reticle.
Match the Optic to Your Firearm
Your firearm platform dictates the size, weight, and durability requirements of your optic. For pistols, red dot sights must be compact, lightweight, and incredibly rugged to withstand the violent, constant recoil of a reciprocating slide. A low-profile design ensures better balance and faster alignment, which is critical for defensive carry or competitive shooting.
In contrast, rifles and AR-15 platforms benefit from larger optics that emphasize versatility across varying distances. These setups allow for larger viewing windows, flexible mounting heights to integrate with backup iron sights, and a more robust housing. Because weight is distributed across a larger platform, rifle optics can prioritize a broader field of view and extra features over strict weight savings.
Open Reflex vs. Enclosed Optics
The housing design determines how well your sight handles the elements, splitting the market into open and enclosed systems. Open reflex sights feature an exposed emitter lens, making them incredibly lightweight, low-profile, and ideal for handguns. They offer a wide, unobstructed field of view for fast-paced shooting. However, because the electronic emitter is exposed to the open air, debris like rain, snow, or mud can fall into the path of the light, distorting or completely blocking the dot until it is cleaned.
Enclosed or tube-style optics solve this vulnerability by sealing the emitter completely inside a protected housing, usually behind two layers of glass. This makes them immune to harsh weather, mud, and dust, offering ultimate reliability in duty or field conditions. The trade-off for this environmental protection is a bulkier, heavier design and a slightly more restricted, tubed field of view, making them a preferred choice for rifles rather than concealed carry pistols.
Selecting Dot Size (The MOA Rule)
Dot size is measured in MOA (Minute of Angle), where 1 MOA covers roughly 1 inch of a target at 100 yards. Smaller dots, typically around 2 to 3 MOA, are built for precision. Because the dot covers very little of the target, it allows for highly accurate shot placement at longer ranges, making it the ideal choice for rifles, hunting, and target shooting. The main drawback is that smaller dots can be harder and slower for the eye to pick up quickly under stress or in bright sunlight.
Larger dots, measuring 5 to 6+ MOA, are built entirely for speed. The oversized dot is incredibly easy for the human eye to track and acquire instantly upon drawing the firearm. This makes large dots highly popular for defensive handguns and close-range competitive shooting where fractions of a second matter. The compromise comes at a distance, where the larger dot will obscure a significant portion of a small target, reducing your long-range precision.
The Pitfalls: Mounting Footprints and Budgets
A red dot is only as good as its physical connection to your firearm, a factor often complicated by mounting standards. Modern handguns may be advertised as "optics-ready," but mounting patterns are not universal.
If the optic's footprint does not match your handgun slide's specific cut, it will not fit without an adapter plate. While adapter plates work, they add height to your optic, complicate your sight alignment, and introduce extra screws that act as potential points of failure. Seeking a direct-mount match is always the best practice.
When planning your budget, it is vital to look beyond the upfront price tag of the optic itself. A complete setup often requires factoring in the total cost of ownership. This includes buying compatible mounting plates if a direct mount isn't possible, upgrading to high-quality mounting screws, or purchasing taller "suppressor-height" iron sights so you can properly co-witness your physical sights through the optic window as a backup.
Battery Life and "Shake Awake" Tech
Battery reliability is a non-negotiable feature for defense and duty use. Fortunately, modern optic efficiency has skyrocketed, with many sights boasting tens of thousands of hours of continuous run time on a single battery. To maximize this lifespan, look for optics equipped with smart power-saving features.
The Astigmatism Factor
If you have an astigmatism, a standard LED red dot may not look like a crisp, perfect circle. Instead, it might appear blurry, distorted, or shaped like a starburst. This is a physiological issue with how an imperfectly shaped eye focuses projected light, meaning the distortion is in your vision rather than a defect in the optic glass.
There are several ways to combat this effect and achieve a clear sight picture. First, simply turning down the brightness can dramatically reduce the starbursting effect. Second, many shooters find success by switching to a green dot system, as the human eye naturally perceives green light more easily and crisply than red. Finally, if standard red dots remain unusable, the ultimate solution is switching to a prism scope. Prism optics use a reticle that is physically etched into the glass rather than projected by an LED. This ensures the reticle remains perfectly sharp to your eye, even if your astigmatism is severe, with the added benefit that the black reticle is still usable even if the battery dies completely.
Reflex Sight vs Red Dot Sight
In simple terms, a red dot sight is a specific type of reflex sight, but not all reflex sights are simple red dots. Think of "reflex sight" as the umbrella family name and "red dot" as its most popular member.
A reflex sight is the broader technical category. It refers to any non-magnified optic that projects an illuminated aiming point from an internal light source onto a curved, reflective glass lens. The shooter looks through the lens, and the reticle reflects back toward their eye. Because "reflex" covers the entire optical technology, these sights can vary wildly in physical appearance—ranging from open, exposed windows to sealed, tube-style housings. They can also feature a variety of reticle shapes, including crosshairs, open circles, or chevron triangles.
A red dot sight, on the other hand, is the most common and streamlined variation of this technology. Instead of utilizing complex reticles, it strictly projects a single, clean illuminated dot as the aiming point. This straightforward design strips away visual clutter, prioritizing pure speed and intuitive target acquisition. Because they are so simple and effective, red dot sights have become the industry standard for pistols, rifles, and shotguns alike, serving as the go-to choice for fast-paced defensive and target shooting.
Holographic Sight vs Red Dot Sight
While red dot and holographic sights often look identical on top of a rifle, they operate on completely different optical technologies. This fundamental difference in engineering impacts everything from reticle clarity and battery life to how the sight performs when damaged.
Red Dot Sights: The LED Efficiency Standard
A red dot sight operates using a simple electronic loop: a small LED light bounces off a specially coated, curved reflective lens back into your eye. Because this layout relies on a basic reflection, red dots are incredibly efficient. A single battery can easily power a red dot continuously for up to 50,000 hours (roughly 5 years).
They are lightweight, mechanically simple, and generally affordable, making them excellent choices for handguns, rifles, and shotguns alike. The main drawback stems from physiology—because the sight bounces projected light directly off glass, shooters with an astigmatism will often see a distorted "starburst" shape rather than a crisp circle.
Holographic Sights: The Laser Powerhouse
A holographic sight dispenses with simple LEDs entirely. Instead, a powerful laser transmits the image of a recorded three-dimensional hologram reticle directly through the viewing glass. This distinct laser projection produces a highly complex, multi-segmented reticle—most famously a 68 MOA ring with a fine 1 MOA center dot.
Holographic sights excel in extreme situations:
- Zero Distortion: The laser-etched design appears floating out on the target rather than flat on the glass, which can look much crisper to shooters with an astigmatism.
- Battlefield Durability: If a holographic sight's front window gets smashed or covered in mud, the laser can still project the full, unbroken reticle through whatever clean fragment of glass remains.
However, running a high-powered laser comes with steep trade-offs. Holographic sights are notably heavier, bulkier, and far more complex internally. They also consume batteries rapidly, usually offering a run time of only 600 to 1,000 hours, and sit at a much higher premium price point.
Prism Sight vs Red Dot Sight
While both red dots and prism sights are exceptional options for fast target acquisition, they are completely different animals internally. The choice between them usually comes down to whether you prioritize unlimited physical flexibility or optical crispness.
Red Dot Sights: Speed and Mechanical Flexibility
A red dot sight is a marvel of simplicity. Because it simply reflects an LED off a single piece of glass, it offers unlimited eye relief—meaning you can mount the optic as far forward or backward on the firearm as you like, and your eye will always see the dot clearly.
This design allows for seamless both-eyes-open shooting, creating a massive field of view and lightning-fast target acquisition. Red dots are exceptionally lightweight and boast battery lifespans measured in years. The only real vulnerability is human physiology: if you have an astigmatism, your eye will likely distort that crisp LED point into a blurry smudge or a starburst pattern.
Prism Sights: The Built-In Precision Solution
Prism sights ditch the open reflection system entirely, using an internal glass prism structure similar to a traditional rifle scope. Instead of projecting a dot using loose light, a prism sight features a reticle physically etched directly into the glass lens.
This completely changes the shooting experience:
- The Astigmatism Cure: Because the reticle is physically engraved into the glass, it appears perfectly crisp, sharp, and distortion-free to every shooter, completely neutralizing astigmatism.
- Fail-Safe Reliability: If your battery dies out in the field, the reticle doesn't disappear—it simply turns from illuminated red or green to a solid black, keeping you fully in the fight.
- Optional Magnification: While available in true 1 times configurations, prism sights frequently offer fixed magnification (like 2times or 3 times), giving you an advantage when tracking targets at medium ranges.
However, treating an optic like a traditional scope introduces traditional scope limitations. Prism sights have a fixed eye relief, meaning your eye must sit within a specific distance from the rear lens to see the full picture. They are also noticeably heavier and bulkier than standard red dots, trading raw speed and mounting freedom for crisp visual detail.
FAQs
Should a beginner use a red dot?
Yes—most beginners can absolutely benefit from using a red dot sight, and in many cases it can make learning to shoot faster and easier. Because a red dot removes the need to align front and rear iron sights, beginners can focus more on trigger control, stance, and target awareness, rather than struggling with sight alignment.
What does a red dot do?
A red dot sight provides a simple, fast aiming reference that helps shooters place shots more quickly and intuitively compared to traditional iron sights. Instead of aligning a front sight, rear sight, and target, the shooter only needs to place the illuminated dot directly on the target, which significantly reduces the time required to aim.
Inside the optic, an LED projects a small red (or sometimes green) dot onto a specially coated lens. This dot appears to “float” on the target image, allowing the shooter to maintain focus on the target rather than shifting attention to the sight itself. This makes shooting more natural and improves situational awareness, especially in fast-moving or defensive scenarios.
A red dot sight also supports both-eyes-open shooting, meaning the shooter can keep full peripheral vision while aiming. This improves awareness of surroundings and helps track moving targets more effectively.
Can a red dot sight be used with astigmatism?
Yes, a red dot sight can still be used effectively with astigmatism, but the way the dot appears may look different depending on the severity of the condition. Many shooters with astigmatism notice that the dot is not perfectly round and may appear blurry, stretched, starburst-shaped, or duplicated, especially at higher brightness settings. This happens because the eye’s cornea or lens does not focus light evenly, rather than a problem with the optic itself.
Despite this, many users are still able to shoot accurately by making a few adjustments. Lowering the brightness level often helps reduce the starburst effect and makes the dot appear more defined. Some shooters also find that changing the dot color (for example, using green instead of red) improves clarity, as different wavelengths can be perceived more sharply depending on the individual’s vision.
Another strong alternative is using a prism optic with an etched reticle, which does not rely on projected light. Because the reticle is physically engraved into the glass, it remains crisp and clear even for users with astigmatism. This is often considered the most reliable solution when traditional red dots are difficult to use.
What is the effective range of a red dot sight?
The effective range of a red dot sight is not fixed by the optic itself, but by the firearm, ammunition, shooter skill, and dot size (MOA). In general, red dot sights are designed primarily for close to medium-range shooting, where speed and target acquisition matter most.
For pistols equipped with red dots, the practical effective range is typically around 10 to 50 yards for most defensive and training scenarios. Skilled shooters can extend this further—sometimes out to 100 yards or more—but accuracy becomes increasingly dependent on experience, stability, and dot precision.
For rifles such as an AR-15 platform, red dot sights are commonly effective out to about 100 to 200 yards for rapid engagement. With training and favorable conditions, some shooters can push accurate hits beyond this range, but red dots are generally not optimized for precision long-distance shooting compared to magnified optics.
How does a red dot sight work?
A red dot sight works by using a simple but highly effective optical system that projects an illuminated aiming point onto a specially designed lens. Inside the optic, an LED light source generates a small red (or sometimes green) dot. This light is directed onto a coated, angled lens that reflects the dot back toward the shooter while allowing most ambient light and the target image to pass through.
What makes the system useful is that the dot appears to be “floating” on the target. This happens because the optic is designed to be parallax-minimized. In practical terms, this means that as long as the shooter keeps the dot on the target, the point of impact will remain consistent even if the eye is not perfectly centered behind the sight.
Unlike traditional iron sights, which require aligning the rear sight, front sight, and target in a straight line, a red dot simplifies the process to just placing one point (the dot) on the target. This greatly speeds up aiming and reduces visual complexity.
Most red dot sights are also non-magnified (1x optics), meaning they do not zoom in on the target. This allows shooters to keep both eyes open, maintaining full peripheral awareness while still seeing the aiming dot clearly.
How to mount a red dot sight?
Mounting a red dot sight correctly is essential for reliability, accuracy, and maintaining zero under recoil. The exact process depends on whether you are installing it on a pistol or a rifle, but the core principles are the same: secure fit, correct footprint, and proper alignment.
For pistols, the first step is to confirm your slide is optics-ready and matches the red dot’s mounting footprint (such as RMR, RMSc, or DeltaPoint Pro). If the footprints match, the optic can be mounted directly onto the slide using the provided screws, often with a small amount of thread locker (like blue Loctite) to prevent loosening from recoil. If the footprints do not match, an adapter plate is required, though this may raise the optic slightly and affect sight alignment with iron sights. Once installed, the optic should be torqued to the manufacturer’s specification and checked for secure seating.
For rifles, such as the AR-15 rifle, mounting is generally more straightforward. Most red dots attach to a Picatinny rail system, allowing the optic to be positioned forward on the upper receiver for an optimal sight picture. After placing the optic on the rail, the mounting screws or clamp should be tightened evenly to ensure stability. Proper positioning is important to achieve a comfortable eye relief and maintain a clear field of view.
Once mounted, the next step is zeroing the optic, which involves adjusting windage and elevation so the point of aim matches the point of impact at a chosen distance. After zeroing, it’s recommended to recheck all mounting screws to ensure nothing has shifted during initial firing.