
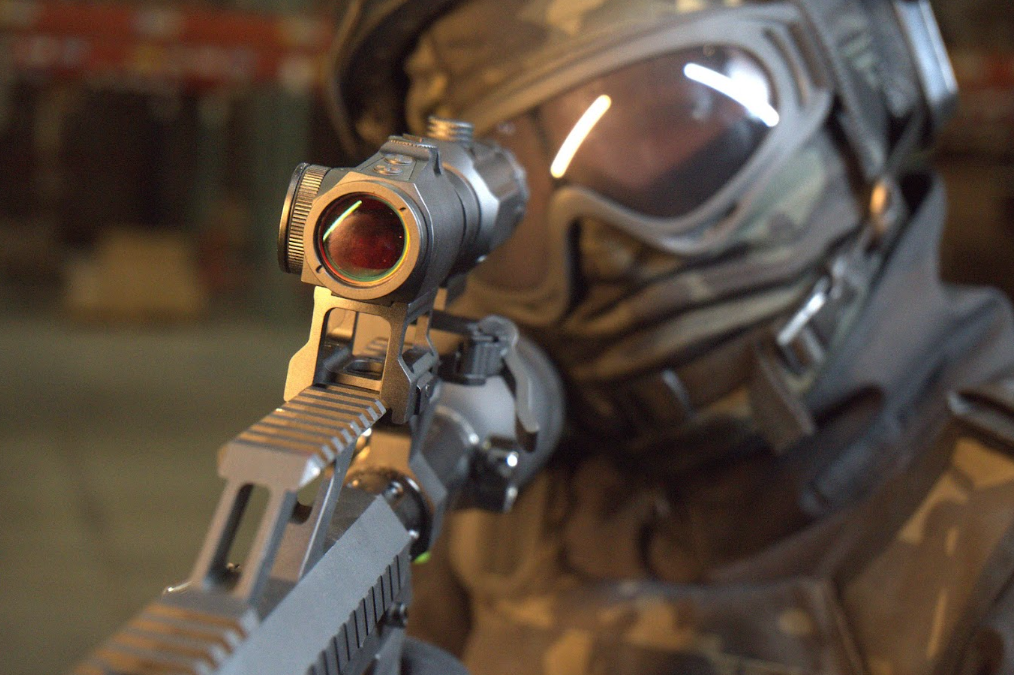
Red dot sights have revolutionized target acquisition for shooters, offering speed and precision in dynamic scenarios. However, improper setup or calibration can lead to frustration, especially when the reticle refuses to center. If you’re struggling to zero your new 1x20mm Tactical Red Dot Sight with Riser (4 MOA) or wondering if it’s compatible with a Weaver rail system, this step-by-step guide will address both concerns while highlighting the sight’s tactical advantages.
Step 1: Verify Compatibility with Your Weaver Rail
Before adjustments, confirm whether the sight fits your firearm’s mounting system. The 1x20mm Tactical Red Dot Sight includes a 1 riser mount designed for Picatinny or Weaver rails—the two most common rail standards. While Picatinny and Weaver rails have subtle differences (e.g., slot width), this sight’s mounting clamp is adjustable to accommodate both.
How to Mount the Sight:
1. Loosen the Rail Clamp: Use the included hex key to loosen the screws on the sight’s base.
2. Align the Sight: Position the red dot’s rail slot over your firearm’s Weaver rail, ensuring it sits parallel to the barrel.
3. Secure the Clamp: Tighten the screws evenly to prevent misalignment. Avoid overtightening, as this could damage the rail or sight.
4. Check Stability: Gently wiggle the sight to confirm it’s firmly attached. A loose mount will cause inconsistent shots.
Step 2: Calibrate the Red Dot to Center
If your reticle won’t center, the issue often lies in improper windage (horizontal) or elevation (vertical) adjustments. The **1x20mm Tactical Red Dot Sight** features ±35 MOA of adjustment range, with 1 MOA per click, providing ample room for zeroing.
Tools Needed:
- A stable shooting rest or sandbags
- A target placed at 25 yards (for initial zeroing)
Adjustment Process:
1. Remove Lens Caps: Ensure the amber multi-coated lens is unobstructed for a clear sight picture.
2. Power On the Sight: Rotate the brightness dial to a medium setting (e.g., level 6). The 4 MOA dot should be visible against your target.
3. Fire a 3-Shot Group: Aim at the bullseye and fire three rounds. Note where the group lands relative to your point of aim.
4. Adjust Windage (Left/Right):
- If shots land left, turn the windage knob clockwise (“Right” direction).
- If shots land right, turn counterclockwise (“Left” direction).
Each click moves the dot 1 MOA (≈1 inch at 100 yards).
5. Adjust Elevation (Up/Down):
- If shots land low, turn the elevation knob clockwise (“Up” direction).
- If shots land high, turn counterclockwise (“Down” direction).
6. Re-Test: Fire another group and repeat adjustments until the red dot aligns with your point of impact.
Pro Tip: If the dot still won’t center after maxing out adjustments (±35 MOA), remount the sight. Misaligned installation can create artificial limits.

Step 3: Optimize Brightness for Your Environment
Step 4: Utilize Both-Eyes-Open Shooting
Step 5: Maintain Durability and Clarity
- Waterproofing: While the housing is sealed, avoid submerging the sight unnecessarily.
- Lens Care: Clean the scratch-resistant amber lens with a microfiber cloth. Avoid abrasive materials.
- Battery Management: Replace the CR2032 battery annually or when brightness dims.
Why This Sight Excels on Weaver Rails
Troubleshooting Common Issues
- Blurry Dot: Check for lens smudges or improper brightness. The multi-coated lens should deliver a crisp reticle.
- Battery Drain: Store the sight with brightness at the lowest setting to conserve power.
Share:
Hunting Zones & Deer Management Units in 2024-2025 Florida
Pinty 2MOA Smiley Face Red Dot Sight: Performance Meets Fun