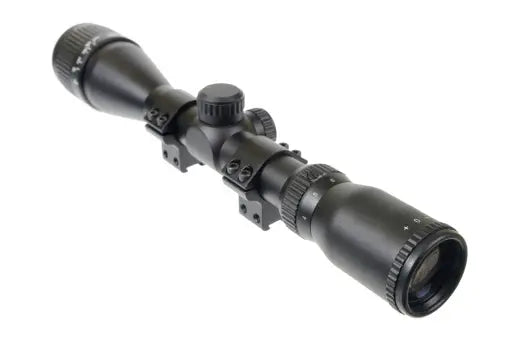
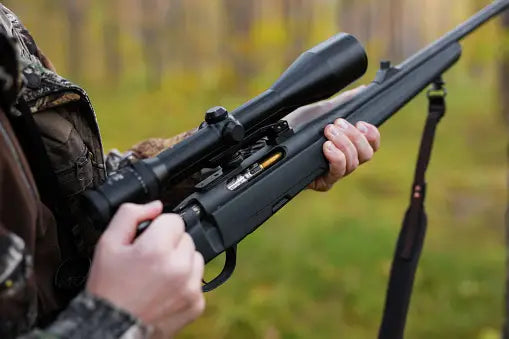
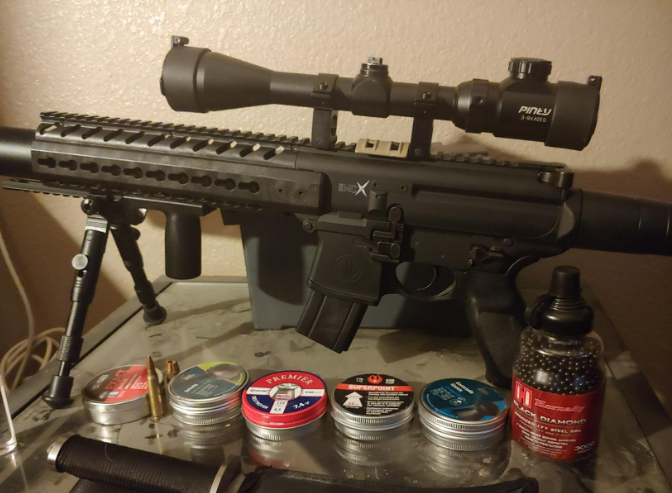
To select the right rifle scope, first consider the primary purpose—whether it's for hunting, target shooting, or competition. Different scopes are designed to meet specific needs, such as magnification ranges, reticle types, and lens coatings. For hunting, a scope with variable magnification (e.g., 3-9x) is ideal, while competition shooting might demand higher magnification for precision.
Mounting the scope correctly is equally crucial. Ensure the rings are tight and properly aligned to avoid any shifts in the point of impact. The eye relief and the position of the scope on the rifle should allow for a full field of view and comfort. Lastly, understanding the adjustments, such as windage, elevation, and parallax settings, is key. These enable fine-tuning of the scope to adapt to different shooting distances and environmental conditions, ultimately maximizing your accuracy and performance. Would you like to delve deeper into any specific aspect of rifle scope selection?
Choosing the Right Rifle Optics
When selecting a rifle scope, it’s important to consider several key factors that directly impact the scope’s performance and suitability for your intended shooting activities. A well-chosen scope can significantly enhance your accuracy, provide greater comfort, and improve your overall shooting experience.
Intended Use
Different types of shooting demand different scopes, each designed with specific features for optimal performance.
- Hunting: For hunting, versatility is crucial, as you'll often be dealing with varying distances and changing environments. A scope with variable magnification (e.g., 3-9x40mm or 4-12x40mm) is a great choice for a wide range of situations. These scopes offer flexibility for both short-range shots in thick cover and longer shots at open fields. The 40mm objective lens provides a good balance of light transmission and weight.
- Long-Range Shooting: If your focus is on long-range precision shooting, a scope with higher magnification (e.g., 6-24x50mm) is ideal. The higher magnification allows for fine adjustments to target placement over great distances. Scopes in this category often come with features like side parallax adjustments and target turrets to allow for quick elevation and windage adjustments, making them excellent for competitive shooting or long-distance target practice.
- Close-Range/Tactical Shooting: For tactical shooting, home defense, or close-range engagements, a scope with lower magnification (e.g., 1-4x24mm or 1-6x24mm) is recommended. These scopes allow for fast target acquisition, offering a wide field of view and quick focus adjustments. Many tactical scopes also feature illuminated reticles, making them ideal for low-light situations.

Key Features to Consider
Magnification Range
Magnification determines how far you can clearly see through your scope. Scopes with a fixed magnification (e.g., 4x40mm) offer simplicity and durability but are limited to a single level of magnification. Variable magnification scopes (e.g., 3-9x40mm, 4-16x50mm) offer more versatility and can adapt to different shooting ranges. Higher magnification is generally more useful for long-range precision, while lower magnification is better for closer distances and rapid target acquisition.
Reticle Type
- The reticle is the crosshairs or aiming point inside the scope. Different reticle designs suit different applications:
- Duplex reticle: A popular choice for hunters, it features thin crosshairs that thicken toward the edges, allowing for easier targeting at longer distances.
- Mil-dot reticle: Ideal for tactical and long-range shooters, it includes small dots along the crosshairs, allowing you to make quick estimations of range, windage, and elevation.
- Illuminated reticle: Useful in low-light conditions, this reticle is illuminated to improve visibility against dark or complex backgrounds, making it particularly helpful in hunting at dawn or dusk.
Objective Lens Diameter
The objective lens (the front lens) plays a key role in gathering light. A larger objective lens (e.g., 50mm) allows more light to enter, improving clarity and brightness, especially in low-light conditions (such as dawn or dusk). However, larger lenses also make the scope heavier and bulkier. A 40mm objective lens is a good balance between weight, light transmission, and size, while a 50mm or larger lens provides enhanced light-gathering ability for longer shots.
Eye Relief
Eye relief refers to the distance between your eye and the ocular lens (the rear lens) of the scope. Adequate eye relief is essential for comfort and safety, especially when using high-recoil rifles. A scope with longer eye relief (e.g., 3.5 to 4 inches) will reduce the risk of "scope bite" (the scope hitting your face) and provide greater comfort, particularly for shooters who wear glasses or shoot large-caliber rifles.
Light Transmission
A scope’s light transmission is the ability of the lenses to transmit light from the target to your eye. Higher light transmission results in brighter, clearer images, especially in low-light situations. Look for scopes that feature high-quality multi-coated lenses, as they significantly improve light transmission and reduce glare, which is especially important when hunting at dawn or dusk.
Proper Mounting Procedures for Optics
Mounting a scope correctly ensures accuracy and prevents damage. Follow these condensed steps for a secure, properly aligned setup. Click here for more detailed steps.
Preparation
- Clean mounting surfaces: Remove dirt, oil, or rust from the receiver and scope rings.
- Gather tools: Torque wrench, level, mounting rings, bases, and thread-locking compound.
Installation Steps
1. Install base mounts to the receiver and tighten screws to the manufacturer's specifications.
2. Attach scope rings to the base. Loosely tighten screws but don’t fully secure yet.
3. Place the scope in the rings, ensuring it’s positioned for proper eye relief (3-4 inches).
4. Level the scope: Use a level on the scope or base to ensure it's horizontal and aligned.
5. Tighten ring screws using a torque wrench to the specified torque setting. Alternate tightening to ensure even pressure.
6. Double-check alignment: Ensure the scope is level, eye relief is correct, and all screws are tight.
Post-Installation
- Check for clearance: Ensure the scope doesn't interfere with the rifle's action or stock.
- Recheck torque: After test firing, ensure all screws are secure.
- Zero the scope: After mounting, zero your scope at the desired distance.
Boresighting Techniques
Boresighting ensures your rifle scope is aligned with the rifle’s bore before live fire, saving time and ammunition. Whether using a laser or traditional method, ensuring proper alignment saves time and ammunition for accurate shooting at the range. Here are two common boresighting methods.
Laser Boresighting Method
Laser boresighting is quick and effective, using a laser tool to simulate a bullet’s path.
Steps
1. Ensure Rifle is Unloaded and Secure: Double-check the rifle is unloaded, and secure it in a stable position.
2. Insert Laser Boresight into Chamber: Place the laser boresight in the chamber, ensuring it’s compatible with your rifle.
3. Mount Rifle Securely and Power on Laser: Set the rifle on a rest and turn on the laser to project a dot downrange.
4. Align Scope with Laser Dot: Look through the scope and adjust the reticle to match the laser dot.
5. Make Adjustments: Fine-tune the windage and elevation to align the scope and laser.
6. Verify at Multiple Distances: Confirm alignment at different ranges to ensure accuracy.
Traditional Boresighting Method
This method involves visually aligning the scope by looking through the rifle's bore.
Steps
1. Remove the Bolt (If Possible): Remove the bolt to see through the bore. If not, secure the rifle in place.
2. Secure Rifle in Stable Position: Ensure the rifle is fixed to prevent any movement.
3. Look Through Bore at Target Center: Align the bore with the center of the target.
4. Adjust Scope to Align with Bore: Adjust the scope’s reticle to match the target center as seen through the bore.
5. Verify at Multiple Ranges: Confirm alignment at different distances.
Final Steps
After boresighting, finalize the adjustments for accuracy.
Steps
1. Confirm All Adjustments are Locked: Ensure all windage, elevation, and focus settings are secure.
2. Record Initial Settings: Note your initial settings for reference.
3. Test at Range: Fire test shots at the range to check alignment.
4. Make Final Adjustments: Fine-tune the scope based on actual shot placement.
Remember that while boresighting is an excellent starting point, final zero should always be confirmed with live fire at the range. Each rifle and scope combination may require slight variations in mounting and adjustment procedures, so always consult manufacturer specifications for both the scope and rifle.

